Lab 0
Environment
MacBook Air M2 2022
Parallels: Ubuntu 22.04 ARM64
理论知识可以参考Chapter7 The Application Layer
A. S. Tanenbaum, N. Feamster, and D. Wetherall, Computer networks, Sixth edition, Global edition. Harlow, United Kingdom: Pearson, 2021.
1 Set up GNU/Linux on your computer
Run Ubuntu version 22.10, then install the required packages:
sudo apt update && sudo apt install git cmake gdb build-essential clang \
            clang-tidy clang-format gcc-doc pkg-config glibc-doc tcpdump tshark

2 Networking by hand
Do two tasks by hand: retrieving a Web page (just like a Web browser) and sending an email message (like an email client). Both of these tasks rely on a networking abstraction called a reliable bidirectional byte stream: you’ll type a sequence of bytes into the terminal, and the same sequence of bytes will eventually be delivered, in the same order, to a program running on another computer (a server). The server responds with its own sequence of bytes, delivered back to your terminal.
2.1 Fetch a Web page
- In a Web browser, visit http://cs144.keithw.org/hello and observe the result

- Now, you’ll do the same thing the browser does, by hand.
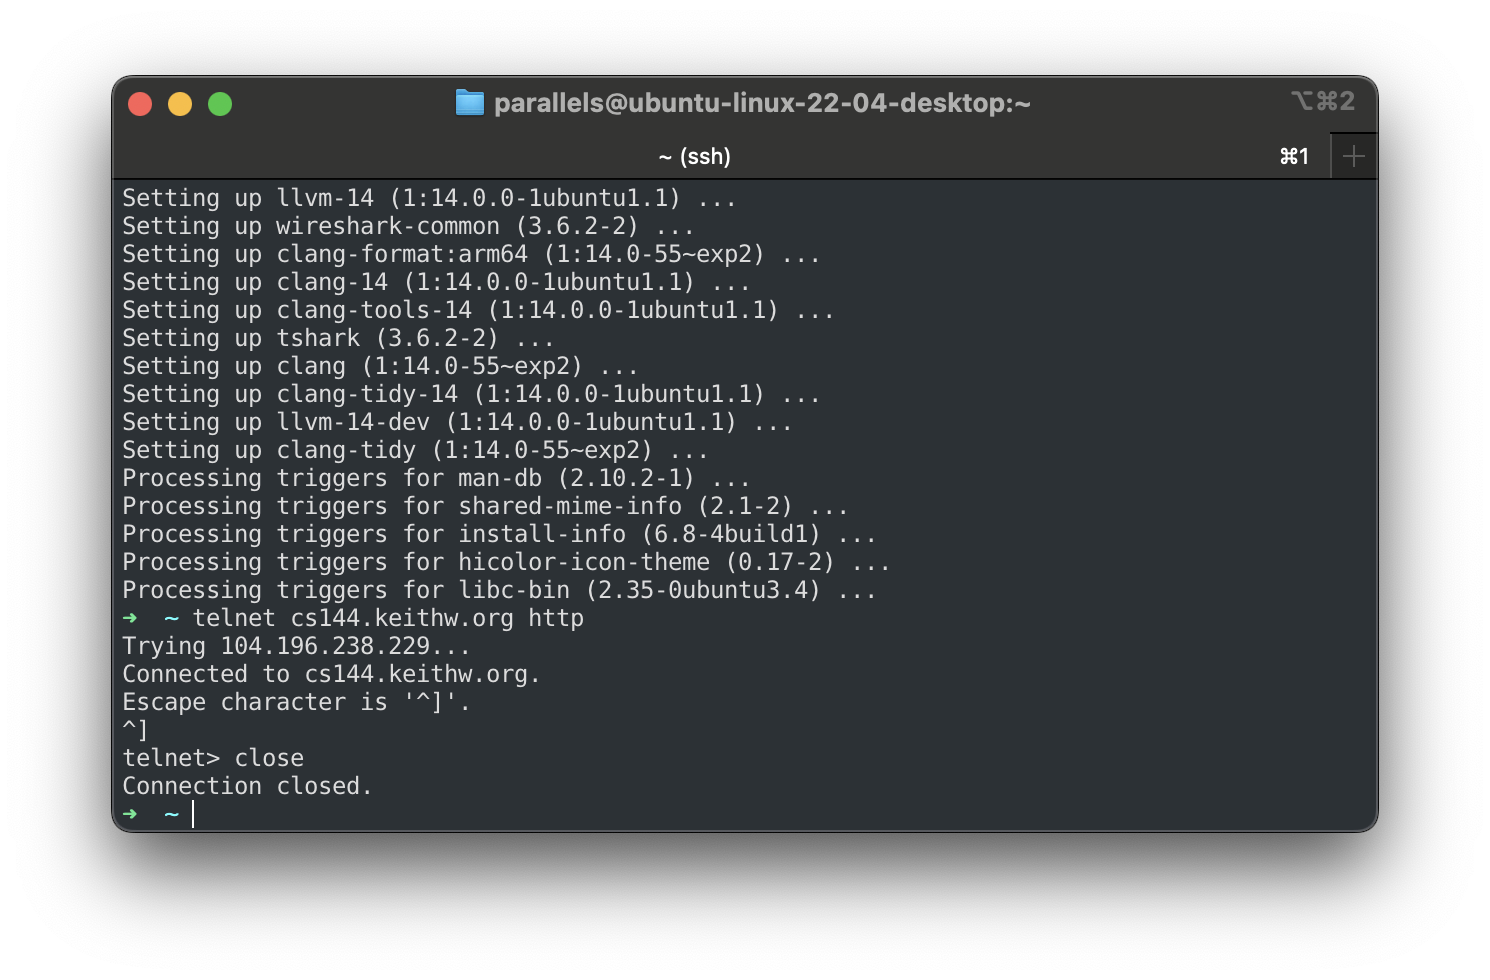
(a) On your VM, run telnet cs144.keithw.org http . This tells the telnet program to open a reliable byte stream between your computer and another computer (named cs144.keithw.org), and with a particular service running on that computer: the “http” service, for the Hyper-Text Transfer Protocol, used by the World Wide Web.
If your computer has been set up properly and is on the Internet, you will see:
user@computer:~$ telnet cs144.keithw.org http
Trying 104.196.238.229...
Connected to cs144.keithw.org.
Escape character is '^]'.
If you need to quit, hold down ctrl and press ] , and then type close
(b) Type GET /hello HTTP/1.1 . This tells the server the path part of the URL. (The part starting with the third slash.)
(c) Type Host: cs144.keithw.org . This tells the server the host part of the URL. (The part between http:// and the third slash.)
(d) Type Connection: close. This tells the server that you are finished making requests, and it should close the connection as soon as it finishes replying.
(e) Hit the Enter key one more time. This sends an empty line and tells the server that you are done with your HTTP request.
(f) If all went well, you will see the same response that your browser saw, preceded by HTTP headers that tell the browser how to interpret the response.

- Assignment: Now that you know how to fetch a Web page by hand, show us you can! Use the above technique to fetch the URL http://cs144.keithw.org/lab0/sunetid, replacing sunetid with your own primary SUNet ID. You will receive a secret code in the X-Your-Code-Is: header. Save your SUNet ID and the code for inclusion in your writeup.
Solution:

telnet 明文通信, ssh加密通道
因为HTTP是一个ASCII协议, 所以对于一个坐在终端(浏览器的对面)前面的人来说很容易与Web服务器直接通话. 这里所需要的全部只是一个连到服务器端口80的TCP连接.
telnet cs144.keithw.org http这个命令序列启动一个telnet连接(即TCP连接), Web服务器为cs144.keithw.org. 然后GET命令, 指定了URL的路径和协议. 接下来一行是强制的Host头. 最后一个头后面必须跟一个空行. 它告诉服务器没有更多的请求头了. 然后服务器发送响应消息. 根据不同的服务器和URL, 可以观察到不同类型的头和页面.
2.2 Send yourself an email
Now that you know how to fetch a Web page, it’s time to send an email message, again using a reliable byte stream to a service running on another computer.
- SSH to
sunetid@cardinal.stanford.edu(to make sure you are on Stanford’s network), then runtelnet 148.163.153.234 smtp. The “smtp” service refers to the Simple Mail Transfer Protocol, used to send email messages. If all goes well, you will see:
user@computer:~$ telnet 148.163.153.234 smtp
Trying 148.163.153.234...
Connected to 148.163.153.234.
Escape character is '^]'.
220 mx0b-00000d03.pphosted.com ESMTP mfa-m0214089
Depends on I not on Standford's network.
- First step: identify your computer to the email server. Type
HELO mycomputer.stanford.edu. Wait to see something like250 ... Hello cardinal3.stanford.edu [171.67.24.75], pleased to meet you.
- Next step: who is sending the email? Type
MAIL FROM: sunetid @stanford.edu.
Replace sunetid with your SUNet ID. If all goes well, you will see 250 2.1.0 Sender ok.

- Next: who is the recipient? For starters, try sending an email message to yourself. Type
RCPT TO: sunetid@stanford.edu. Replace sunetid with your own SUNet ID.
If all goes well, you will see 250 2.1.5 Recipient ok.
- It’s time to upload the email message itself. Type
DATAto tell the server you’re
ready to start. If all goes well, you will see 354 End data with <CR><LF>.<CR><LF>.

Because I not in the standford web, I can not finish this part. So this part skip.
- Now you are typing an email message to yourself. First, start by typing the headers that you will see in your email client. Leave a blank line at the end of the headers.
354 End data with <CR><LF>.<CR><LF>
From: sunetid@stanford.edu
To: sunetid@stanford.edu
Subject: Hello from CS144 Lab 0!
354 End data with <CR><LF>.<CR><LF>
From: 1018@stanford.edu
To: 1018@stanford.edu
Subject: Hello from CS144 Lab 0!
-
Type the
bodyof the email message—anything you like. When finished, end with a dot on a line by itself:.. Expect to see something like:250 2.0.0 33h24dpdsr-1 Message accepted for delivery. -
Type
QUITto end the conversation with the email server. Check your inbox and spam folder to make sure you got the email. - Assignment: Now that you know how to send an email by hand to yourself, try sending one to a friend or lab partner and make sure they get it. Finally, show us you can send one to us. Use the above technique to send an email, from yourself, to cs144grader@gmail.com.
https://zhuanlan.zhihu.com/p/586285278
Skip.
2.3 Listening and connecting
使用telnet建立双工通信
You’ve seen what you can do with telnet: a client program that makes outgoing connections to programs running on other computers. Now it’s time to experiment with being a simple server: the kind of program that waits around for clients to connect to it.
- In one terminal window, run
netcat -v -l -p 9090on your VM. You should see:
-
Leave netcat running. In another terminal window, run
telnet localhost 9090(also on your VM). -
If all goes well, the netcat will have printed something like
Connection from localhost 53500 received!. -
Now try typing in either terminal window—the
netcat(server) or thetelnet(client). Notice that anything you type in one window appears in the other, and vice versa. You’ll have to hitenterfor bytes to be transfered. -
In the
netcatwindow, quit the program by typingctrl -C. Notice that the telnet program immediately quits as well.

互联网最初通信的模样.
3 Writing a network program using an OS stream socket
In the next part of this warmup lab, you will write a short program that fetches a Web page over the Internet. You will make use of a feature provided by the Linux kernel, and by most other operating systems: the ability to create a reliable bidirectional byte stream between two programs, one running on your computer, and the other on a different computer across the Internet (e.g., a Web server such as Apache or nginx, or the netcat program).
在这个热身实验室的下一部分中,您将编写一个通过互联网获取网页的简短程序。你将利用Linux内核和大多数其他操作系统提供的功能:在两个程序之间创建可靠的双向字流,一个运行在你的计算机上,另一个运行在互联网上的另一台计算机上(例如,Apache或nginx等Web服务器,或netcat程序)
This feature is known as a stream socket. To your program and to the Web server, the socket looks like an ordinary file descriptor (similar to a file on disk, or to the stdin or stdout I/O streams). When two stream sockets are connected, any bytes written to one socket will eventually come out in the same order from the other socket on the other computer.
这个特性被称为流套接字(stream socket)。对于你的程序和Web服务器来说,socket看起来就像一个普通的文件描述符(类似于磁盘上的文件,或者
stdin或stdoutI/O流)。当连接两个流套接字时,写入其中一个套接字的任何字节最终都会以相同的顺序从另一台计算机上的另一个套接字输出。
In reality, however, the Internet doesn't provide a service of reliable byte-streams. Instead, the only thing the Internet really does is to give its "best effort" to deliver short pieces of data, called Internet datagrams, to their destination. Each datagram contains some metadata (headers) that specifies things like the source and destination addresses--what computer it came from, and what computer it's headed towards--as well as some payload data (up to about 1,500 bytes) to be delivered to the destination computer.
但实际上,互联网并不提供可靠的字节流服务。相反,互联网真正做的唯一一件事是“尽最大努力”将称为“互联网数据报”的短数据片段发送到目的地。每个数据报包含一些元数据(头),这些元数据指定了源地址和目标地址——它来自哪台计算机,它将去往哪台计算机——以及一些要交付到目标计算机的有效载荷数据(最多1500字节)。
Although the network tries to deliver every datagram, in practice datagrams can be (1) lost, (2) delivered more than once. It's normally the job of the operating systems on either end of the connection to turn "best-effort datagrams" (the abstraction the Internet provides) into "reliable byte streams" (the abstraction that applications usually want).
尽管网络试图交付每个数据报,但实际上数据报可能(1)丢失,(2)多次交付。连接两端操作系统的工作通常是将“尽力而为的数据报”(Internet提供的抽象)转换为“可靠的字节流”(应用程序通常需要的抽象)。
The two computers have to cooperate to make sure that each byte in the stream eventually gets delivered, in its proper place in line, to the stream socket on the other side. They also have to tell each other how much data they are prepared to accept from the other computer, using an agreed-upon scheme that was set down in 1981, called the Transmission Control Protocol, or TCP.
两台计算机必须合作,以确保流中的每个字节最终都在合适的位置发送到另一端的流套接字。它们还必须告诉对方准备从另一台计算机接收多少数据,使用的是1981年制定的一个被称为传输控制协议(Transmission Control Protocol,简称TCP)的协议。
In this lab, you will simply use the operating system's pre-existing support for the Transmission Control Protocol. You'll write a program called webget that creates a TCP stream socket, connects to a Web server, and fetches a page--much as you did earlier in this lab. In future labs, you'll implement the other side of this abstraction, by implementing the Transmission Control Protocol yourself to create a reliable byte-stream out of not-so-reliable datagrams.
在本实验室中,您将简单地使用操作系统对传输控制协议的预先存在的支持。您将编写一个名为
webget的程序,它创建一个TCP流套接字,连接到Web服务器,并获取页面——就像您在本实验室之前所做的那样。在未来的实验中,你将实现这种抽象的另一面,通过自己实现传输控制协议,从不那么可靠的数据报中创建可靠的字节流。
在IP层, 数据包传输的原则是"best-effort", 即尽最大努力传输数据, 但不保证一定送达.
数据包可能会丢失, 重传, 出错, 乱序到达.
把这种混乱的数据包变成可靠的字节流, 则是TCP传输层的责任.
3.1 Let’s get started—fetching and building the starter code
- The lab assignments will use a starter codebase called “Minnow.” On your VM, run
git clone https://github.com/cs144/minnow to fetch the source code for the lab.
- Optional: Feel free to backup your repository to a private GitHub/GitLab/Bitbucket repository (e.g., using the instructions at https://stackoverflow.com/questions/10065526/ github-how-to-make-a-fork-of-public-repository-private), but please make absolutely sure that your work remains private.
- Enter the Lab 0 directory:
cd minnow - Create a directory to compile the lab software:
cmake -S . -B build
So I have to update the cmake
$ cd ~
$ cd download
$ wget https://github.com/Kitware/CMake/releases/download/v3.28.0-rc1/cmake-3.28.0-rc1.tar.gz
$ tar -zxvf cmake-3.24.2.tar.gz
# Navigate to the extracted directory
$ cd cmake-3.24.2/
# Create a build directory
$ mkdir build && cd build

# Configure the build
$ ../bootstrap

# Error show me I don't have openssl
$ sudo apt update
$ sudo apt install libssl-dev

$ ../bootstrap
$ make

# Install
$ sudo make install
$ cmake --version


- Compile the source code:
cmake --build build
Find the
tests/common.hh:change this:
To:
做到下面发现这种方式不对, 需要升级g++
$ cd ~
$ sudo apt install g++-12
$ g++-12 --version
$ sudo update-alternatives --install /usr/bin/g++ g++ /usr/bin/g++-12 50
$ sudo update-alternatives --config g++
$ g++ version


- Outside the build directory, open and start editing the
writeups/check0.mdfile. This is the template for your lab checkpoint writeup and will be included in your submission.

3.2 Modern C++: mostly safe but still fast and low-level
The lab assignments will be done in a contemporary C++ style that uses recent (2011) features to program as safely as possible. This might be different from how you have been asked to write C++ in the past. For references to this style, please see the C++ Core Guidelines (http://isocpp.github.io/CppCoreGuidelines/CppCoreGuidelines).
The basic idea is to make sure that every object is designed to have the smallest possible public interface, has a lot of internal safety checks and is hard to use improperly, and knows how to clean up after itself. We want to avoid “paired” operations (e.g. malloc/free, or new/delete), where it might be possible for the second half of the pair not to happen (e.g., if a function returns early or throws an exception). Instead, operations happen in the constructor to an object, and the opposite operation happens in the destructor. This style is called “Resource acquisition is initialization,” or RAII.
其基本思想是确保每个对象都被设计为具有尽可能小的公共接口,有大量的内部安全检查,难以不当使用,并知道如何在之后进行清理。我们希望避免“配对”操作(例如malloc/free,或new/delete),因为配对操作的后半部分可能不会发生(例如,如果函数提前返回或抛出异常)。相反,操作发生在对象的构造函数中,而相反的操作发生在析构函数中。这种风格称为“资源获取即初始化”,或者RAII。
In particular, we would like you to:
-
Use the language documentation at https://en.cppreference.com as a resource. (We’d recommend you avoid
cplusplus.comwhich is more likely to be out-of-date.) -
Never use
malloc()orfree() -
Never use new or delete
-
Essentially never use raw pointers (*), and use “smart” pointers (
unique_ptrorshared_ptr) only when necessary. (You will not need to use these in CS144.) -
Avoid templates, threads, locks, and virtual functions. (You will not need to use these in CS144.)
-
Avoid C-style strings (
char *str) or string functions (strlen(),strcpy()). These are pretty error-prone. Use astd::stringinstead. -
Never use C-style casts (e.g., (FILE *)x). Use a C++
static castif you have to (you generally will not need this in CS144). -
Prefer passing function arguments by const reference (e.g.:
const Address & address). -
Make every variable
constunless it needs to be mutated. -
Make every method const unless it needs to mutate the object.
-
Avoid global variables, and give every variable the smallest scope possible.
-
Before handing in an assignment, run
cmake --build build --target tidyfor suggestions on how to improve the code related to C++ programming practices, and
cmake --build build --target format to format the code consistently.
On using Git: The labs are distributed as Git (version control) repositories—a way of documenting changes, checkpointing versions to help with debugging, and tracking the provenance of source code. Please make frequent small commits as you work, and use commit messages that identify what changed and why. The Platonic ideal is that each commit should compile and should move steadily towards more and more tests passing. Making small “semantic” commits helps with debugging (it’s much easier to debug if each commit compiles and the message describes one clear thing that the commit does) and protects you against claims of cheating by documenting your steady progress over time—and it’s a useful skill that will help in any career that includes software development. The graders will be reading your commit messages to understand how you developed your solutions to the labs. If you haven’t learned how to use Git, please do ask for help at the CS144 office hours or consult a tutorial (e.g., https://guides.github.com/introduction/git-handbook). Finally, you are welcome to store your code in a private repository on GitHub, GitLab, Bitbucket, etc., but please make sure your code is not publicly accessible.
鉴于我不是斯坦福的学生, 我没有助教以及教授可以询问相关的lab. 孤军奋战的感觉, 我会将我的过程记录下来, 以便他人像我一样的独自摸索的人使用.
3.3 Reading the Minnow support code
To support this style of programming, Minnow’s classes wrap operating-system functions (which can be called from C) in “modern” C++. We have provided you with C++ wrappers for concepts we hope you’re familiar with from CS 110/111, especially sockets and file descriptors.
Please read over the public interfaces (the part that comes after “public:” in the files util/socket.hh and util/file_descriptor.hh. (Please note that a Socket is a type of FileDescriptor, and a TCPSocket is a type of Socket.)
https://cs144.github.io/doc/lab0/
https://cs144.github.io/doc/lab0/inherits.html
FileDescriptor Class Reference: https://cs144.github.io/doc/lab0/class_file_descriptor.html

Socket Class Reference:https://cs144.github.io/doc/lab0/class_socket.html

TCPSocket Class Reference: https://cs144.github.io/doc/lab0/class_t_c_p_socket.html

util/socket.hh:
这段代码定义了多个与网络相关的C++类
#pragma once // 这是一个常用的预处理器命令,确保头文件在一个编译单元中只被包含一次

#include "address.hh"
#include "file_descriptor.hh"

#include <cstdint>
#include <functional>
#include <sys/socket.h>
//这部分代码包含了需要的头文件

//! \brief Base class for network sockets (TCP, UDP, etc.)
//! \details Socket is generally used via a subclass. See TCPSocket and UDPSocket for usage examples.
class Socket : public FileDescriptor //定义了一个名为 Socket 的类,该类从 FileDescriptor 类继承
{
private:   // 开始定义 Socket 类的私有成员
  //! Get the local or peer address the socket is connected to
  Address get_address( const std::string& name_of_function,
                       const std::function<int( int, sockaddr*, socklen_t* )>& function ) const;
// 一个私有方法,用于根据提供的函数获取socket的地址信息。例如,可以用它来获取socket的本地或远程地址

protected:     //开始定义 Socket 类的受保护成员
  //! Construct via [socket(2)](\ref man2::socket)
  Socket( int domain, int type, int protocol = 0 );
  // 一个受保护的构造函数,用于根据指定的域、类型和协议创建一个socket

  //! Construct from a file descriptor.
  Socket( FileDescriptor&& fd, int domain, int type, int protocol = 0 );
  // 另一个受保护的构造函数,接受一个 FileDescriptor 对象并用其创建一个socket

  //! Wrapper around [getsockopt(2)](\ref man2::getsockopt)
  template<typename option_type>
  socklen_t getsockopt( int level, int option, option_type& option_value ) const;
  // 一个模板函数,用于获取socket的选项值

  //! Wrappers around [setsockopt(2)](\ref man2::setsockopt)
  template<typename option_type>
  void setsockopt( int level, int option, const option_type& option_value );
  // 一个模板函数,用于设置socket的选项值

  void setsockopt( int level, int option, std::string_view option_val );
    // 另一个函数重载,允许使用 std::string_view 设置socket选项

public: // 开始定义 Socket 类的公共成员
  //! Bind a socket to a specified address with [bind(2)](\ref man2::bind), usually for listen/accept
  void bind( const Address& address );
  // 一个方法,用于将socket绑定到指定的地址

  //! Bind a socket to a specified device
  void bind_to_device( std::string_view device_name );
  // 一个方法,允许socket绑定到指定的设备(例如,一个特定的网络接口)

  //! Connect a socket to a specified peer address with [connect(2)](\ref man2::connect)
  void connect( const Address& address );
  // 一个方法,用于将socket连接到指定的远程地址

  //! Shut down a socket via [shutdown(2)](\ref man2::shutdown)
  void shutdown( int how );
  // 关闭socket的某个方向的通信

  //! Get local address of socket with [getsockname(2)](\ref man2::getsockname)
  Address local_address() const;// 返回socket的本地地址
  //! Get peer address of socket with [getpeername(2)](\ref man2::getpeername)
  Address peer_address() const; // 返回socket的远程地址

  //! Allow local address to be reused sooner via [SO_REUSEADDR](\ref man7::socket)
  void set_reuseaddr(); // 设置socket的选项,允许重用本地地址

  //! Check for errors (will be seen on non-blocking sockets)
  void throw_if_error() const; // 检查socket上的错误,并在检测到错误时抛出异常
};

// 定义一个名为 DatagramSocket 的类,该类从 Socket 类继承。这个类似乎是为UDP或其他数据报协议的sockets而设计的
class DatagramSocket : public Socket
{
  using Socket::Socket;

public:
  //! Receive a datagram and the Address of its sender
  void recv( Address& source_address, std::string& payload );
  // 从socket接收一个数据报,并获取其来源地址和负载

  //! Send a datagram to specified Address
  void sendto( const Address& destination, std::string_view payload );
  // 发送一个数据报到指定的地址

  //! Send datagram to the socket's connected address (must call connect() first)
  void send( std::string_view payload );
  // 发送一个数据报到socket已连接的地址
};

// 定义了一个名为 UDPSocket 的类,用于表示UDP socket。它从 DatagramSocket 类继承
//! A wrapper around [UDP sockets](\ref man7::udp)
class UDPSocket : public DatagramSocket
{
  //! \param[in] fd is the FileDescriptor from which to construct
  explicit UDPSocket( FileDescriptor&& fd ) : DatagramSocket( std::move( fd ), AF_INET, SOCK_DGRAM ) {}

public:
  //! Default: construct an unbound, unconnected UDP socket
  UDPSocket() : DatagramSocket( AF_INET, SOCK_DGRAM ) {}
};

//! A wrapper around [TCP sockets](\ref man7::tcp)
// 定义了一个名为 TCPSocket 的类,用于表示TCP socket。它从 Socket 类继承
class TCPSocket : public Socket
{
private:
  //! \brief Construct from FileDescriptor (used by accept())
  //! \param[in] fd is the FileDescriptor from which to construct
  explicit TCPSocket( FileDescriptor&& fd ) : Socket( std::move( fd ), AF_INET, SOCK_STREAM ) {}

public:
  //! Default: construct an unbound, unconnected TCP socket
  TCPSocket() : Socket( AF_INET, SOCK_STREAM ) {}

  //! Mark a socket as listening for incoming connections
  void listen( int backlog = 16 );
  // 标记此socket为监听状态,并设置未决连接的最大数量

  //! Accept a new incoming connection
  TCPSocket accept();
  // 接受一个新的入站连接,并返回一个新的 TCPSocket 对象
};

//! A wrapper around [packet sockets](\ref man7:packet)
// 定义了一个名为 PacketSocket 的类,用于处理数据包socket(例如,用于原始套接字编程)。它从 DatagramSocket 类继承
class PacketSocket : public DatagramSocket
{
public:
  PacketSocket( const int type, const int protocol ) : DatagramSocket( AF_PACKET, type, protocol ) {}

  void set_promiscuous(); // 设置socket为混杂模式,这允许捕获所有经过网络接口的数据包
};
util/file_descriptor.hh:
#pragma once

#include <cstddef>
#include <limits>
#include <memory>
#include <vector>

// A reference-counted handle to a file descriptor
class FileDescriptor
{
  // FDWrapper: A handle on a kernel file descriptor.
  // FileDescriptor objects contain a std::shared_ptr to a FDWrapper.
  class FDWrapper
  {
  public:
    int fd_;                    // The file descriptor number returned by the kernel
    bool eof_ = false;          // Flag indicating whether FDWrapper::fd_ is at EOF
    bool closed_ = false;       // Flag indicating whether FDWrapper::fd_ has been closed
    bool non_blocking_ = false; // Flag indicating whether FDWrapper::fd_ is non-blocking
    unsigned read_count_ = 0;   // The number of times FDWrapper::fd_ has been read
    unsigned write_count_ = 0;  // The numberof times FDWrapper::fd_ has been written

    // Construct from a file descriptor number returned by the kernel
    explicit FDWrapper( int fd );
    // Closes the file descriptor upon destruction
    ~FDWrapper();
    // Calls [close(2)](\ref man2::close) on FDWrapper::fd_
    void close();

    template<typename T>
    T CheckSystemCall( std::string_view s_attempt, T return_value ) const;

    // An FDWrapper cannot be copied or moved
    FDWrapper( const FDWrapper& other ) = delete;
    FDWrapper& operator=( const FDWrapper& other ) = delete;
    FDWrapper( FDWrapper&& other ) = delete;
    FDWrapper& operator=( FDWrapper&& other ) = delete;
  };

  // A reference-counted handle to a shared FDWrapper
  std::shared_ptr<FDWrapper> internal_fd_;

  // private constructor used to duplicate the FileDescriptor (increase the reference count)
  explicit FileDescriptor( std::shared_ptr<FDWrapper> other_shared_ptr );

protected:
  // size of buffer to allocate for read()
  static constexpr size_t kReadBufferSize = 16384;

  void set_eof() { internal_fd_->eof_ = true; }
  void register_read() { ++internal_fd_->read_count_; }   // increment read count
  void register_write() { ++internal_fd_->write_count_; } // increment write count

  template<typename T>
  T CheckSystemCall( std::string_view s_attempt, T return_value ) const;

public:
  // Construct from a file descriptor number returned by the kernel
  explicit FileDescriptor( int fd );

  // Free the std::shared_ptr; the FDWrapper destructor calls close() when the refcount goes to zero.
  ~FileDescriptor() = default;

  // Read into `buffer`
  void read( std::string& buffer );
  void read( std::vector<std::unique_ptr<std::string>>& buffers );

  // Attempt to write a buffer
  // returns number of bytes written
  size_t write( std::string_view buffer );
  size_t write( const std::vector<std::string_view>& buffers );

  // Close the underlying file descriptor
  void close() { internal_fd_->close(); }

  // Copy a FileDescriptor explicitly, increasing the FDWrapper refcount
  FileDescriptor duplicate() const;

  // Set blocking(true) or non-blocking(false)
  void set_blocking( bool blocking );

  // Size of file
  off_t size() const;

  // FDWrapper accessors
  int fd_num() const { return internal_fd_->fd_; }                        // underlying descriptor number
  bool eof() const { return internal_fd_->eof_; }                         // EOF flag state
  bool closed() const { return internal_fd_->closed_; }                   // closed flag state
  unsigned int read_count() const { return internal_fd_->read_count_; }   // number of reads
  unsigned int write_count() const { return internal_fd_->write_count_; } // number of writes

  // Copy/move constructor/assignment operators
  // FileDescriptor can be moved, but cannot be copied implicitly (see duplicate())
  FileDescriptor( const FileDescriptor& other ) = delete;            // copy construction is forbidden
  FileDescriptor& operator=( const FileDescriptor& other ) = delete; // copy assignment is forbidden
  FileDescriptor( FileDescriptor&& other ) = default;                // move construction is allowed
  FileDescriptor& operator=( FileDescriptor&& other ) = default;     // move assignment is allowed
};
3.4 Writing webget
It’s time to implement webget, a program to fetch Web pages over the Internet using the operating system’s TCP support and stream-socket abstraction—just like you did by hand earlier in this lab.
- From the
builddirectory, open the file../apps/webget.ccin a text editor or IDE. - In the
get_URLfunction, find the comment starting// Your code here. - Implement the simple Web client as described in this file, using the format of an HTTP (Web) request that you used earlier. Use the
TCPSocketandAddressclasses. -
Hints: * Please note that in HTTP, each line must be ended with
\r\n(it’s not sufficient to use just\norendl). * Don’t forget to include theConnection: closeline in your client’s request. This tells the server that it shouldn’t wait around for your client to send any more requests after this one. Instead, the server will send one reply and then will immediately end its outgoing bytestream (the one from the server’s socket to your socket). You’ll discover that your incoming byte stream has ended because your socket will reach “EOF” (end of file) when you have read the entire byte stream coming from the server. That’s how your client will know that the server has finished its reply. * Make sure to read and print all the output from the server until the socket reaches “EOF” (end of file)—a single call to read is not enough. * We expect you’ll need to write about ten lines of code. -
Compile your program by running
make. If you see an error message, you will need to fix it before continuing. -
Test your program by running
./apps/webget cs144.keithw.org /hello. How does this compare to what you see when visiting http://cs144.keithw.org/hello in a Web browser? How does it compare to the results from Section 2.1? Feel free to experiment—test it with any http URL you like! -
When it seems to be working properly, run
cmake --build build --target check_webgetto run the automated test. Before implementing theget_URLfunction, you should expect to see the following:
$ cmake --build build --target check_webget
Test project /home/cs144/minnow/build
    Start 1: compile with bug-checkers
1/2 Test #1: compile with bug-checkers ........
Passed
1.02 sec
    Start 2: t_webget
2/2 Test #2: t_webget .........................***Failed
Function called: get_URL(cs144.keithw.org, /nph-hasher/xyzzy)
Warning: get_URL() has not been implemented yet.
ERROR: webget returned output that did not match the test's expectations
After completing the assignment, you will see:
$ cmake --build build --target check_webget
Test project /home/cs144/minnow/build
     Start 1: compile with bug-checkers
1/2 Test #1: compile with bug-checkers ........ Passed   1.09 sec
    Start 2: t_webget
2/2 Test #2: t_webget ......................... Passed   0.72 sec
    100% tests passed, 0 tests failed out of 2
- The graders will run your
webgetprogram with a different hostname and path thanmake check_webgetruns—so make sure it doesn’t only work with the hostname and path used by the unit tests.
此处一直报错. 因为和
tests/webget_t.sh有关. 更改格式如下:#!/bin/bash # shellcheck disable=SC2006 WEB_HASH=`"${1}"/apps/webget cs144.keithw.org /nph-hasher/xyzzy | tee /dev/stderr | tail -n 1` CORRECT_HASH="7SmXqWkrLKzVBCEalbSPqBcvs11Pw263K7x4Wv3JckI" if [ "${WEB_HASH}" != "${CORRECT_HASH}" ]; then echo ERROR: webget returned output that did not match the test\'s expectations exit 1 fi exit 0然后重新make 一下进行测试可以通过


void get_URL( const string& host, const string& path )
{
    TCPSocket sock;
    sock.connect( Address( host, "http" ) );
    sock.write("GET " + path + " HTTP/1.1\r\n"    // 请求行
                               "Host: " + host + "\r\n"           // 告知服务器主机名
                                                 "Connection: close\r\n"            // 通知服务器关闭连接
                                                 "\r\n");                           // 空行
    sock.shutdown( SHUT_WR ); // 关闭写端

    while ( !sock.eof() ) {   // 读取所有数据
        string tmp;
        sock.read( tmp );
        cout << tmp;
    }
    sock.close();
}
// Definition of a function named get_URL that accepts two constant string references, host and path.
void get_URL( const string& host, const string& path )
{
    // Declaration of an object named sock of type TCPSocket.
    // This will be used to establish a TCP connection to the target host.
    TCPSocket sock;
    sock.connect( Address( host, "http" ) );
    // Connecting to the target host on the HTTP port (which is typically port 80).
    // The Address class probably constructs a network address from the provided host and service name (in this case, "http").
    sock.write("GET " + path + " HTTP/1.1\r\n"
                               // Writing the HTTP request method (GET),
                               // followed by the desired path, and then the HTTP version (HTTP/1.1).
                               "Host: " + host + "\r\n"
                               // Setting the Host header of the HTTP request to
                               // the provided host.
                               // This header specifies the domain name of the server.
                                                 "Connection: close\r\n"
                                                 // Setting the Connection header to close,
                                                 // which indicates to the server that the
                                                 // client wants to close the connection
                                                 // after completion of the response.
                                                 "\r\n");
    // Appending an empty line (\r\n\r\n) to indicate the end of the HTTP headers.
    // This is a standard in HTTP requests.

    sock.shutdown( SHUT_WR );
    // Shutting down the writing end of the socket.
    // This means that no more data will be sent over this connection, but reading is still possible.

    while ( !sock.eof() ) {   // Looping until the end of the file (EOF) for the socket. This checks whether there's more data to read.
        string tmp; // Declaration of a string variable named tmp to hold the data that will be read from the socket.
        sock.read( tmp ); //Reading data from the socket into the tmp string.
        cout << tmp; //Outputting the read data (stored in tmp) to the standard output
    }
    sock.close(); //losing the socket, which terminates the connection to the server.
}
void get_URL(const string &host, const string &path) {
    TCPSocket tcpSocket{};

    const Address address(host, "http");
    tcpSocket.connect(address);

    const string request = "GET " + path+ " HTTP/1.1\r\n" + "Host: "+host+"\r\n" + "Connection: close\r\n\r\n";
    tcpSocket.write(request);
    string buffer;

    while (!tcpSocket.eof()){
        tcpSocket.read(buffer);
        cout<<buffer;
    }
    tcpSocket.close();

}
两种写法都可以通过测试.
https://blog.csdn.net/J__M__C/article/details/131713326?ops_request_misc=&request_id=&biz_id=102&utm_term=cs144%20lab1%202023%20Writing%20webget&utm_medium=distribute.pc_search_result.none-task-blog-2~all~sobaiduweb~default-0-131713326.nonecase&spm=1018.2226.3001.4187
4 An in-memory reliable byte stream
By now, you’ve seen how the abstraction of a reliable byte stream can be useful in communicating across the Internet, even though the Internet itself only provides the service of “best-effort” (unreliable) datagrams.
To finish off this week’s lab, you will implement, in memory on a single computer, an object that provides this abstraction. (You may have done something similar in CS 110/111.) Bytes are written on the “input” side and can be read, in the same sequence, from the “output” side. The byte stream is finite: the writer can end the input, and then no more bytes can be written. When the reader has read to the end of the stream, it will reach “EOF” (end of file) and no more bytes can be read.
Your byte stream will also be flow-controlled to limit its memory consumption at any given time. The object is initialized with a particular “capacity”: the maximum number of bytes it’s willing to store in its own memory at any given point. The byte stream will limit the writer in how much it can write at any given moment, to make sure that the stream doesn’t exceed its storage capacity. As the reader reads bytes and drains them from the stream, the writer is allowed to write more. Your byte stream is for use in a single thread—you don’t have to worry about concurrent writers/readers, locking, or race conditions.
To be clear: the byte stream is finite, but it can be almost arbitrarily long4 before the writer ends the input and finishes the stream. Your implementation must be able to handle streams that are much longer than the capacity. The capacity limits the number of bytes that are held in memory (written but not yet read) at a given point, but does not limit the length of the stream. An object with a capacity of only one byte could still carry a stream that is terabytes and terabytes long, as long as the writer keeps writing one byte at a time and the reader reads each byte before the writer is allowed to write the next byte.
Here’s what the interface looks like for the writer:
void push( std::string data ); // Push data to stream, but only as much as available capacity allows. void close(); // Signal that the stream has reached its ending. Nothing more will be written.
void set_error(); // Signal that the stream suffered an error.
bool is_closed() const; // Has the stream been closed?
uint64_t available_capacity() const; // How many bytes can be pushed to the stream right now? uint64_t bytes_pushed() const; // Total number of bytes cumulatively pushed to the stream
And here is the interface for the reader:
std::string_view peek() const; // Peek at the next bytes in the buffer void pop( uint64_t len ); // Remove `len` bytes from the buffer
bool is_finished() const; // Is the stream finished (closed and fully popped)? bool has_error() const; // Has the stream had an error?
uint64_t bytes_buffered() const; // Number of bytes currently buffered (pushed and not popped) uint64_t bytes_popped() const; // Total number of bytes cumulatively popped from stream
Please open the src/byte_stream.hh and src/byte_stream.cc files, and implement an object that provides this interface. As you develop your byte stream implementation, you can run the automated tests with cmake --build build --target check0.
If all tests pass, the check0 test will then run a speed benchmark of your implementation. Anything faster than 0.1 Gbit/s (in other words, 100 million bits per second) is acceptable
for purposes of this class. (It is possible for an implementation to perform faster than 10 Gbit/s, but this depends on the speed of your computer and is not required.)
For any late-breaking questions, please check out the lab FAQ on the course website or ask your classmates or the teaching staff in the lab session (or on EdStem).
What’s next? Over the next four weeks, you’ll implement a system to provide the same inter- face, no longer in memory, but instead over an unreliable network. This is the Transmission Control Protocol—and its implementations are arguably the most prevalent computer program in the world.
// byte_stream.hh
#pragma once

#include <queue>
#include <stdexcept>
#include <string>
#include <string_view>

class Reader;
class Writer;

class ByteStream
{
protected:
  uint64_t capacity_;
  // Please add any additional state to the ByteStream here, and not to the Writer and Reader interfaces.
  /**
   *  Eve
   */
   enum State { CLOSED, ERROR };
   uint64_t bytes_pushed_ {}; // 已写入的字节数
   uint64_t bytes_popped_ {}; // 已弹出的字节数

   unsigned char flag {}; //0: normal, 1: closed, 2:error
   std::queue<std::string> buffer_data{};
   std::string_view buffer_view {};
   /*
    * End
    */

public:
  explicit ByteStream( uint64_t capacity );

  // Helper functions (provided) to access the ByteStream's Reader and Writer interfaces
  Reader& reader();
  const Reader& reader() const;
  Writer& writer();
  const Writer& writer() const;
};

class Writer : public ByteStream
{
public:
  void push( std::string data ) noexcept; // Push data to stream, but only as much as available capacity allows.

  void close() noexcept;     // Signal that the stream has reached its ending. Nothing more will be written.
  void set_error() noexcept; // Signal that the stream suffered an error.

  bool is_closed() const noexcept;              // Has the stream been closed?
  uint64_t available_capacity() const noexcept; // How many bytes can be pushed to the stream right now?
  uint64_t bytes_pushed() const noexcept;       // Total number of bytes cumulatively pushed to the stream
};

class Reader : public ByteStream
{
public:
  std::string_view peek() const noexcept; // Peek at the next bytes in the buffer
  void pop( uint64_t len ) noexcept;      // Remove `len` bytes from the buffer

  bool is_finished() const noexcept; // Is the stream finished (closed and fully popped)?
  bool has_error() const noexcept;   // Has the stream had an error?

  uint64_t bytes_buffered() const noexcept; // Number of bytes currently buffered (pushed and not popped)
  uint64_t bytes_popped() const noexcept;   // Total number of bytes cumulatively popped from stream
};

/*
 * read: A (provided) helper function thats peeks and pops up to `len` bytes
 * from a ByteStream Reader into a string;
 */
void read( Reader& reader, uint64_t len, std::string& out );
https://zhuanlan.zhihu.com/p/630739394

5 Submit
-
In your submission, please only make changes to webget.cc and the source code in the top level of src (byte stream.hh and byte stream.cc). Please don’t modify any of the tests or the helpers in util.
-
Before handing in any assignment, please run these in order:
(a) Make sure you have committed all of your changes to the Git repository. You can run git status to make sure there are no outstanding changes. Remember: make small commits as you code.
(b) cmake --build build --target format (to normalize the coding style)
(c) cmake --build build --target check0 (to make sure the automated tests pass)
(d) Optional: cmake --build build --target tidy (suggests improvements to follow good C++ programming practices)
-
Finish editing writeups/check0.md, filling in the number of hours this assignment took you and any other comments.
-
The mechanics of “how to turn it in” will be announced before the deadline.
-
Please let the course staff know ASAP of any problems at the lab session, or by posting a question on EdStem. Good luck and welcome to CS144!