SpringSecurity
安全是开发者永远绕不开的话题,一个不安全的网站,往往存在着各种致命漏洞,只要被不法分子稍加利用,就能直接击溃整个网站,甚至破坏网站宝贵的用户数据。而用户的授权校验,则是网站安全系统的典型代表,这也是用户访问网站的第一关,我们需要一个更加安全和可靠的授权校验框架,才能让我们的网站更加稳定。
SpringSecurity是一个基于Spring开发的非常强大的权限验证框架,其核心功能包括:
- 认证 (用户登录)
- 授权 (此用户能够做哪些事情)
- 攻击防护 (防止伪造身份攻击)
本章,我们会从多个方面对此框架进行介绍,让各位小伙伴能够在自己的项目中使用更加安全和可靠的身份校验方案。
网络安全基础
网络安全是当今互联网时代非常重要的一个议题。在信息爆炸的今天,网络安全问题频频发生,给个人和组织带来了严重的损失和威胁,随着技术的发展和互联网的普及,我们越来越意识到网络安全已经成为一个全球性的挑战。本部分,我们会给各位小伙伴介绍网络安全的相关概念,以及常见的Web服务器攻击形式,如果你已经了解相关内容,可以直接跳过本板块。
其中比较典型的案例有以下几个:
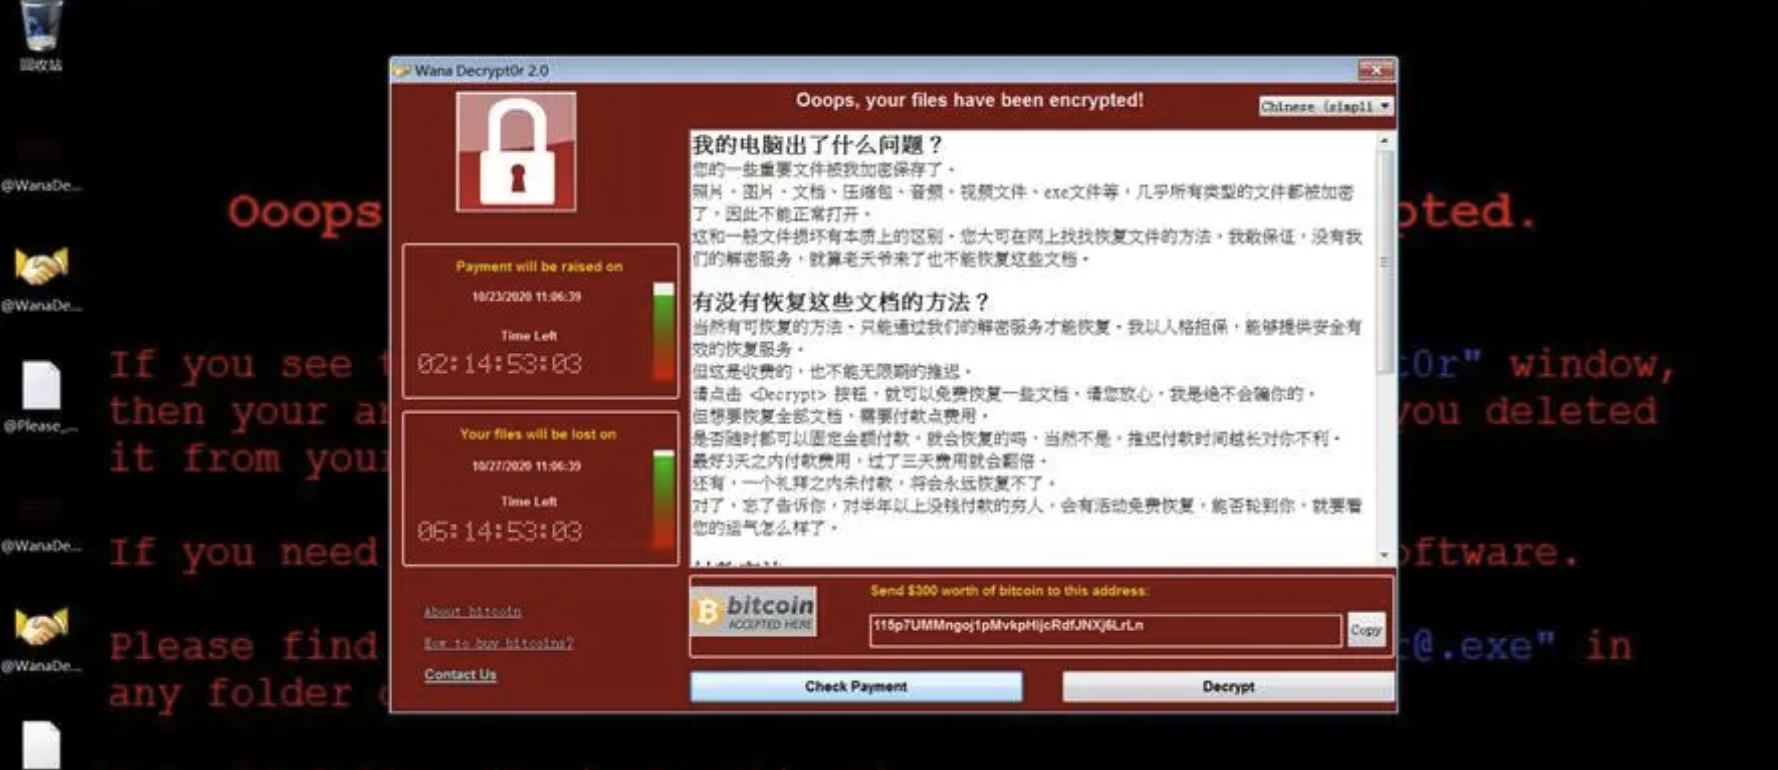
在2017年,一款名叫WannaCry的勒索软件席卷全球,导致全球大量计算机受到影响,得益于全球网络的发达,这款病毒从小规模很快发展至全球范围,勒索病毒是自熊猫烧香以来影响力最大的病毒之一。
WannaCry(又叫Wanna Decryptor),一种“蠕虫式”的勒索病毒软件,大小3.3MB,由不法分子利用NSA(National Security Agency,美国国家安全局)泄露的危险漏洞“EternalBlue”(永恒之蓝)进行传播 [1] 。勒索病毒肆虐,俨然是一场全球性互联网灾难,给广大电脑用户造成了巨大损失。最新统计数据显示,100多个国家和地区超过10万台电脑遭到了勒索病毒攻击、感染。 [2] 勒索病毒是自熊猫烧香以来影响力最大的病毒之一。WannaCry勒索病毒全球大爆发,至少150个国家、30万名用户中招,造成损失达80亿美元,已经影响到金融,能源,医疗等众多行业,造成严重的危机管理问题。

除了病毒在网络上传播外,还有非常恶心的DDOS攻击,这种攻击方式成本低,效率高,只要持续一段时间就能导致没有特殊防御的网站无法正常运作:
2022年4月,郑州警方接到报警称,某政府网站平台于近日遭受多次DDoS攻击,导致平台访问量瞬间暴增多倍,造成数十家政府网站和政务新媒体账号无法正常访问。接到报警后,郑州警方立即开展侦查调查,第一时间锁定犯罪嫌疑人张某某,仅22小时就将犯罪嫌疑人张某某抓捕到案。
经审查,张某某为某医院网络安全部技术维护人员,2022年4月2日,其个人网站被DDoS攻击,导致网站无法登陆。为减少攻击对其个人网站的影响,张某某私自将个人网站域名解析地址变更为某政府网站平台地址,“转嫁”攻击流量,致使该政府网站平台被恶意网络流量攻击,多家政府网站、政务新媒体账号不能正常使用。
目前,张某某因涉嫌破坏计算机信息系统犯罪被公安机关移送起诉,案件正在进一步侦办中。

信息泄露也是非常严重的网络安全问题,我们的个人信息是我们的隐私,而在网络发达的今天,在各大APP上填写的信息很有可能会被第三方获取,从中谋取利益。
今年早些时候便已发现相关安全漏洞的网络安全专家称, 一个常见漏洞导致了这场有记录以来最大规模的个人数据泄露,也是中国所遭遇最大规模的网络安全事件,造成数据被公开在互联网上,供人取用。
据这些网络安全专家称,上海警方的这些记录是被安全存储的,其中包含个人姓名、身份证号码、电话号码以及警情信息,涉及近10亿中国公民的数据。他们说,但一个用于管理和访问该数据库的显示界面(dashboard)被设置在一个公开网址上,没有加设密码,任何有相对基本技术知识的人都可以轻松访问、复制或窃取库中的海量信息。
暗网情报公司Shadowbyte的创始人Vinny Troia说:“他们把这么多数据暴露在外,这太疯狂了。”这家公司专门在网上扫描搜寻存在安全漏洞的数据库,早在今年1月扫描时发现了上海警方的这个数据库。
个人信息数据一旦泄露,相当于别人可以通过网络直接定位你的住址、电话号码、各种社交账号、身份证信息甚至是机票、火车票、酒店开房信息等,做的再绝一定,如果这个酒店被人偷偷放了针孔摄像头,甚至还能根据记录查到你开房视频,这些事情光是想想都可怕,这等同于在互联网上“裸奔”。
网络安全问题非同小可,而我们作为网站的开发者,更应该首当其冲解决这些潜在问题。接下来,我们会介绍几个常见的Web网站攻击方式,以及在后续使用SpringSecurity时如何去防范这些攻击行为。
测试环境搭建


    <dependencies>
        <dependency>
            <groupId>jakarta.servlet</groupId>
            <artifactId>jakarta.servlet-api</artifactId>
            <version>5.0.0</version>
            <scope>provided</scope>
        </dependency>
        <dependency>
            <groupId>org.junit.jupiter</groupId>
            <artifactId>junit-jupiter-api</artifactId>
            <version>${junit.version}</version>
            <scope>test</scope>
        </dependency>
        <dependency>
            <groupId>org.junit.jupiter</groupId>
            <artifactId>junit-jupiter-engine</artifactId>
            <version>${junit.version}</version>
            <scope>test</scope>
        </dependency>
        <dependency>
            <groupId>org.springframework</groupId>
            <artifactId>spring-webmvc</artifactId>
            <version>6.0.11</version>
        </dependency>

        <dependency>
            <groupId>org.thymeleaf</groupId>
            <artifactId>thymeleaf-spring6</artifactId>
            <version>3.1.1.RELEASE</version>
        </dependency>

        <dependency>
            <groupId>com.alibaba.fastjson2</groupId>
            <artifactId>fastjson2</artifactId>
            <version>2.0.34</version>
        </dependency>
        <dependency>
            <groupId>com.alibaba.fastjson2</groupId>
            <artifactId>fastjson2-extension-spring6</artifactId>
            <version>2.0.34</version>
        </dependency>
        <dependency>
            <groupId>org.slf4j</groupId>
            <artifactId>jul-to-slf4j</artifactId>
            <version>2.0.7</version>
        </dependency>
        <dependency>
            <groupId>org.slf4j</groupId>
            <artifactId>slf4j-api</artifactId>
            <version>2.0.7</version>
        </dependency>
        <dependency>
            <groupId>org.projectlombok</groupId>
            <artifactId>lombok</artifactId>
            <version>1.18.30</version>
        </dependency>
        <dependency>
            <groupId>jakarta.annotation</groupId>
            <artifactId>jakarta.annotation-api</artifactId>
            <version>2.0.0</version>
        </dependency>
    </dependencies>

WebConfiguration:
package com.example.config;

import com.alibaba.fastjson2.support.spring6.http.converter.FastJsonHttpMessageConverter;
import org.springframework.context.annotation.Bean;
import org.springframework.context.annotation.ComponentScan;
import org.springframework.context.annotation.ComponentScans;
import org.springframework.context.annotation.Configuration;
import org.springframework.http.converter.HttpMessageConverter;
import org.springframework.http.converter.json.MappingJackson2HttpMessageConverter;
import org.springframework.web.servlet.config.annotation.EnableWebMvc;
import org.springframework.web.servlet.config.annotation.WebMvcConfigurer;
import org.springframework.web.servlet.support.AbstractAnnotationConfigDispatcherServletInitializer;
import org.thymeleaf.Thymeleaf;
import org.thymeleaf.spring6.SpringTemplateEngine;
import org.thymeleaf.spring6.templateresolver.SpringResourceTemplateResolver;
import org.thymeleaf.spring6.view.ThymeleafViewResolver;
import org.thymeleaf.templateresolver.ITemplateResolver;


import java.util.List;
@Configuration
@EnableWebMvc
@ComponentScans({
        @ComponentScan("com.example.controller")
})
public class WebConfiguration implements WebMvcConfigurer {
    // Add your configuration here
    // we need to use ThymeleafViewResolver as the view resolver and parse our HTML pages
    @Bean
    public ThymeleafViewResolver thymeleafViewResolver(SpringTemplateEngine springTemplateEngine){
        ThymeleafViewResolver resolver = new ThymeleafViewResolver();
        resolver.setOrder(1);  // it can exist multiple view resolvers and we can set the parsing order for them
        resolver.setCharacterEncoding("UTF-8");   // set the encoding format
        resolver.setTemplateEngine(springTemplateEngine);
        // as we are using Thymeleaf, we need to set the prefix and suffix for the HTML pages
        return resolver;
    }


    // configure the template resolver
    @Bean
    public SpringResourceTemplateResolver templateResolver(){
        SpringResourceTemplateResolver resolver = new SpringResourceTemplateResolver();
        resolver.setSuffix(".html");   // set the suffix of the HTML pages
        resolver.setPrefix("classpath:");
        // set the template mode to HTML and the encoding format
        return resolver;
    }


    // configure the template engine bean
    @Bean
    public SpringTemplateEngine springTemplateEngine(ITemplateResolver resolver){
        SpringTemplateEngine engine = new SpringTemplateEngine();
        engine.setTemplateResolver(resolver);  // set the template resolver
        return engine;
    }

    @Override
    public void configureMessageConverters(List<HttpMessageConverter<?>> converters) {
        converters.add(new FastJsonHttpMessageConverter());
    }


}
为了测试我们之前的网站安全性,这里我们基于Mvc框架重新搭建一个采用之前的验证方式的简易网站,首先是登录界面部分:
<!DOCTYPE html>
<html lang="en">
<head>
    <meta charset="UTF-8">
    <title>登录白马银行</title>
</head>
<body>
  <form action="login" method="post">
    <label>
      用户名:
      <input name="username" type="text">
    </label>
    <label>
      密码:
      <input name="password" type="password">
    </label>
    <button type="submit">登录</button>
  </form>
  <div th:if="${status}">登录失败,用户名或密码错误!</div>
</body>
</html>
接着是登录之后的首页:
<!DOCTYPE html>
<html lang="en">
<head>
    <meta charset="UTF-8">
    <title>白马银行 - 首页</title>
</head>
<body>

</body>
</html>
接着是Controller部分:
@Controller
public class HelloController {
    //处理登录操作并跳转
    @PostMapping("/login")
    public String login(@RequestParam String username,
                        @RequestParam String password,
                        HttpSession session,
                        Model model){
        if("test".equals(username) && "123456".equals(password)) {
            session.setAttribute("login", true);
            return "redirect:/";
        } else {
            model.addAttribute("status", true);
            return "login";
        }
    }

    //处理首页或是登录界面跳转
    @GetMapping("/")
    public String index(HttpSession session){
        if(session.getAttribute("login") != null) {
            return "index";
        }else {
            return "login";
        }
    }
}
这样我们就可以进行简单登录了:


接着我们在首页加一个转账操作,要求填写转账人账号名称:
@ResponseBody
@PostMapping("/pay")
public JSONObject pay(@RequestParam String account,
                      HttpSession session){
    JSONObject object = new JSONObject();
    //登录之后才能转账
    if(session.getAttribute("login") != null) {
        System.out.println("转账给"+account+"成功,交易已完成!");
        object.put("success", true);
    } else {
        System.out.println("转账给"+account+"失败,用户未登录!");
        object.put("success", false);
    }
    return object;
}
接着我们在页面中添加一个简单的转账操作按键:
<!DOCTYPE html>
<html lang="en">
<head>
    <meta charset="UTF-8">
    <title>白马银行 - 首页</title>
    <script src="https://unpkg.com/axios@1.1.2/dist/axios.min.js"></script>
</head>
<body>
    <div>
        <label>
            转账账号:
            <input type="text" id="account"/>
        </label>
        <button onclick="pay()">立即转账</button>
    </div>
</body>
</html>

<script>
function pay() {
    const account = document.getElementById("account").value
    axios.post('/mvc/pay', { account: account }, {
        headers: {
            'Content-Type': 'application/x-www-form-urlencoded'
        }
    }).then(({data}) => {
        if(data.success)
            alert("转账成功")
        else
            alert("转账失败")
    })
}
</script>
这样我们就成功搭建好网络安全的测试项目了,各位小伙伴请将这个项目进行保存,后面需要重复使用。


CSRF跨站请求伪造攻击
CSRF是我们要介绍的第一种攻击形式,这种攻击方式非常好理解。

我们时常会在QQ上收到别人发送的钓鱼网站链接,只要你在上面登陆了你的QQ账号,那么不出意外,你的号已经在别人手中了。实际上这一类网站都属于恶意网站,专门用于盗取他人信息,执行非法操作,甚至获取他人账户中的财产,非法转账等。而这里,我们需要了解一种比较容易发生的恶意操作,从不法分子的角度去了解整个流程。
我们在JavaWeb阶段已经了解了Session和Cookie的机制,在一开始的时候,服务端会给浏览器一个名为JSESSIONID的Cookie信息作为会话的唯一凭据,只要用户携带此Cookie访问我们的网站,那么我们就可以认定此会话属于哪个浏览器用户。因此,只要此会话的用户执行了登录操作,那么就可以随意访问个人信息等内容。
我们来尝试模拟一下这种操作,来编写一个钓鱼网站:
<!DOCTYPE html>
<html lang="en">
<head>
    <meta charset="UTF-8">
    <title>坤坤炒粉放鸡精视频在线观看</title>
    <script src="https://unpkg.com/axios@1.1.2/dist/axios.min.js"></script>
</head>
<body>
<iframe name="hiddenIframe" hidden></iframe>
<form action="http://localhost:8080/mvc/pay" method="post" target="hiddenIframe">
    <input type="text" name="account" value="黑客" hidden>
    <button type="submit">点击下载全套视频</button>
</form>
</body>
</html>
这个页面并不是我们官方提供的页面,而是不法分子搭建的恶意网站。我们发现此页面中有一个表单,但是表单中的输入框被隐藏了,而我们看到的只有一个按钮,我们不知道这是一个表单,也不知道表单会提交给那个地址,这时整个页面就非常有迷惑性了。如果我们点击此按钮,那么整个表单的数据会以POST的形式发送给我们的服务端(会携带之前登陆我们网站的Cookie信息),但是这里很明显是另一个网站跳转,通过这样的方式,恶意网站就成功地在我们毫不知情的情况下引导我们执行了转账操作,当你发现上当受骗时,钱已经被转走了。
我们首先作为用户,先在正常的网站进行登录:

接着我们假装自己上当,进入到我们的钓鱼网站:

现在我们毫不知情,如果是正常人思维的话,就会直接点击下载全套视频,恭喜,此时后台已经转账成功了,留下一脸懵逼的你:

而这种构建恶意页面,引导用户访问对应网站执行操作的方式称为:跨站请求伪造(CSRF,Cross Site Request Forgery)
显然,我们之前编写的图书管理系统就存在这样的安全漏洞,而SpringSecurity就解决了这样的问题。
当然,除了通过我们自己SpringSecurity使用去解决之外,随着现在的浏览器不断发展,安全性越来越受到重视,很多浏览器都有SameSite保护机制,当用户在两个不同域名的站点操作时,默认情况下Cookie就会被自动屏蔽:

SameSite是一种安全机制,旨在防止跨站点请求伪造(CSRF)攻击,它通过限制第三方Cookie的使用来实现这一目的。在Chrome浏览器中,SameSite默认为Lax,这意味着第三方Cookie只能在用户导航到与原始站点相同的站点时发送。这同样大大提升了用户的安全性,让黑客少了许多可乘之机,不过这个机制对做实施的同学(可能)不太友好。
SFA会话固定攻击
这同样是利用Cookie中相同的JSESSIONID进行的攻击,会话固定攻击(Session fixation attack)是一种针对Web应用程序的安全漏洞攻击,攻击者利用这种漏洞,将一个有效的会话ID分配给用户,并诱使用户在该会话中进行操作,然后攻击者可以利用该会话ID获取用户的权限,或者通过此会话继续进行其他攻击。
简单来说,就是黑客把他的JSESSIONID直接给你,你一旦使用这个ID登录,那么在后端这个ID就被认定为已登录状态,那么也就等同于他直接进入了已登录状态,从而直接访问你账号的任意内容,执行任意操作。
攻击者通常使用以下几种方式进行会话固定攻击:
- 会话传递:攻击者通过URL参数、表单隐藏字段、cookie等方式将会话ID传递给用户。当用户使用该会话ID登录时,攻击者就能利用该会话ID获取用户的权限。
- 会话劫持:攻击者利用劫持用户与服务器之间的通信流量,获取到用户的会话ID,然后利用该会话ID冒充用户进行操作。
- 会话劫持:攻击者事先获取到会话ID,并将其分配给用户,之后通过其他方式欺骗用户登录该会话。这样,攻击者就可以利用会话ID获取用户的权限。
这里我们来尝试一下第一种方案,这里我们首先用另一个浏览器访问目标网站,此时需要登录,开始之前记得先清理一下两个浏览器的缓存,否则可能无法生效:

这里我们直接记录下这个JSESSIONID,然后将其编写到我们的诈骗网站中,这里有一个恶意脚本,会自动将对应用户的Cookie进行替换,变成我们的JSESSIONID值:
<!DOCTYPE html>
<html lang="en">
<head>
    <meta charset="UTF-8">
    <title>冠希哥全套视频</title>
    <script src="https://unpkg.com/axios@1.1.2/dist/axios.min.js"></script>
</head>
<body>
<script>
    //第三方网站恶意脚本,自动修改Cookie信息
    document.cookie = "JSESSIONID=6AAF677EC2B630704A80D36311F08E01; path=/mvc; domain=localhost"
    //然后给你弄到原来的网站
    location.href = 'http://localhost:8080/mvc/'
</script>
</body>
</html>
接着我们访问这个恶意网站,然后再作为用户,去正常访问目标网站进行登录操作:

可以看到此时用户的浏览器JSESSIONID值为刚刚恶意网站伪造的值,现在我们来进行登录操作:

此时我们回到一开始的浏览器,刷新之后,我们发现这个浏览器同样已经登录成功了,原理其实很简单,相当于让用户直接帮我们登录了,是不是感觉特别危险?
当然,现在的浏览器同样有着对应的保护机制,Tomcat发送的SESSIONID默认是勾选了HttpOnly选项的,一旦被设定是无法被随意修改的,当然前提是先得正常访问一次网站才行,否则仍然存在安全隐患。
HttpOnly是Cookie中一个属性,用于防止客户端脚本通过document.cookie属性访问Cookie,有助于保护Cookie不被跨站脚本攻击窃取或篡改。但是,HttpOnly的应用仍存在局限性,一些浏览器可以阻止客户端脚本对Cookie的读操作,但允许写操作;此外大多数浏览器仍允许通过XMLHTTP对象读取HTTP响应中的Set-Cookie头。

为了彻底杜绝这个问题,登录成功之后应该重新给用户分配一个新的JSESSIONID才行,而这些都由SpringSecurity帮我们实现了。


XSS跨站脚本攻击
前面我们介绍了两种攻击方式,不过都是从外部干涉,在外部无法干涉的情况下,我们也可以从内部击溃网站,接下来我们隆重介绍XSS跨站脚本攻击方式。
XSS(跨站脚本攻击)是一种常见的网络安全漏洞,攻击者通过在合法网站中注入恶意脚本代码来攻击用户。当用户访问受到注入攻击的页面时,恶意代码会在用户的浏览器中执行,从而导致攻击者能够窃取用户的敏感信息、诱导用户操作、甚至控制用户的账号。
XSS攻击常见的方式有三种:
- 存储型XSS攻击:攻击者将恶意代码存储到目标网站的数据库中,当其他用户访问包含恶意代码的页面时,恶意代码会被执行。
- 反射型XSS攻击:攻击者将恶意代码嵌入到URL中,当用户点击包含恶意代码的URL时,恶意代码会被执行。
- DOM-based XSS攻击:攻击者利用前端JavaScript代码的漏洞,通过修改页面的DOM结构来执行恶意代码。
在一些社交网站上,用户可以自由发帖,而帖子是以富文本形式进行编辑和上传的,发送给后台的帖子往往是直接以HTML代码的形式,这个时候就会给黑客可乘之机了。

正常情况下,用户发帖会向后端上传以下内容,这些是经过转换得到的正常HTML代码,方便后续直接展示:
而现在,黑客不走常规的方式发帖,而是发送以下内容给服务端:
<div class="content ql-editor">
  <p οnlοad="alert('xss')">
    <strong>萨达睡觉了大数据</strong>
  </p>
  <p>撒大大撒大声地</p>
</div>
可以看到p标签上添加了一段JS恶意脚本,黑客可以利用这种特性,获取用户的各种信息,甚至直接发送到他的后台,这样,我们的个人信息就从网站内部被泄露了。
XSS漏洞最早被发现是在1996年,由于JavaScript的出现,导致在Web应用程序中存在了一些安全问题。在1997年,高智文(Gareth Owen)也就是“XSS之父”,在他的博客中描述了一种称为“脚本注入”(script injection)的攻击技术,这就是XSS漏洞的前身。从那时起,XSS漏洞便成为了Web应用程序中的一种常见安全漏洞。
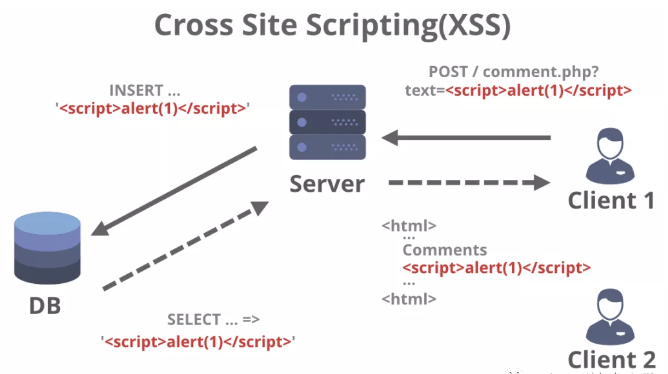
这种攻击一般需要前端配合后端进行防御,或者后端对前端发送的内容进行安全扫描并处理,有机会我们会分享如何防范此类攻击。
在了解这么多攻击方式之后,想必各位小伙伴肯定有了一定的网络安全意识,不过我们并不是网络安全专业的课程,至于更多的攻击形式,还请各位小伙伴自行了解,从下一个板块开始,我们将会正式开始SpringSecurity框架的介绍。
开发环境配置
我们继续使用之前的测试项目进行教学,首先我们需要导入SpringSecurity的相关依赖,它不仅仅是一个模块,我们可以根据需求导入需要的模块,常用的是以下两个:
<dependency>
    <groupId>org.springframework.security</groupId>
    <artifactId>spring-security-web</artifactId>
    <version>6.1.1</version>
</dependency>
<dependency>
    <groupId>org.springframework.security</groupId>
    <artifactId>spring-security-config</artifactId>
    <version>6.1.1</version>
</dependency>
接着我们需要配置SpringSecurity,与Mvc一样,需要一个初始化器:
public class SecurityInitializer extends AbstractSecurityWebApplicationInitializer {
    //不用重写任何内容
    //这里实际上会自动注册一个Filter,SpringSecurity底层就是依靠N个过滤器实现的,我们之后再探讨
}
接着我们需要再创建一个配置类用于配置SpringSecurity:
接着在根容器中添加此配置文件即可:
@Override
protected Class<?>[] getRootConfigClasses() {
    return new Class[]{MainConfiguration.class, SecurityConfiguration.class};
}
这样,SpringSecurity的配置就完成了,我们再次运行项目,会发现无法进入的我们的页面中,无论我们访问哪个页面,都会进入到SpringSecurity为我们提供的一个默认登录页面,之后我们会讲解如何进行配置。

至此,项目环境搭建完成。
clean -> install if encounter some problems


认证
认证是我们网站的第一步,用户需要登录之后才能进入,这一部分我们将详细介绍如何使用SpringSecurity实现用户登录。
基于内存验证
首先我们来看看最简单的基于内存的配置,也就是说我们直接以代码的形式配置我们网站的用户和密码,配置方式非常简单,只需要在Security配置类中注册一个Bean即可:
@Configuration
@EnableWebSecurity
public class SecurityConfiguration {

    @Bean   //UserDetailsService就是获取用户信息的服务
    public UserDetailsService userDetailsService() {
        //每一个UserDetails就代表一个用户信息,其中包含用户的用户名和密码以及角色
        UserDetails user = User.withDefaultPasswordEncoder()
                .username("user")
                .password("password")
                .roles("USER")  //角色目前我们不需要关心,随便写就行,后面会专门讲解
                .build();
        UserDetails admin = User.withDefaultPasswordEncoder()
                .username("admin")
                .password("password")
                .roles("ADMIN", "USER")
                .build();
        return new InMemoryUserDetailsManager(user, admin);
        //创建一个基于内存的用户信息管理器作为UserDetailsService
    }
}

配置完成后,我们就可以前往登录界面,进行登录操作了:

登录成功后,就可以访问到我们之前的界面了:

并且为了防止我们之前提到的会话固定问题,在登录之后,JSESSIONID会得到重新分配:


当我们想要退出时,也可以直接访问:http://localhost:8080/mvc/logout 地址,我们会进入到一个退出登录界面:

退出登录后就需要重新登录才能访问我们的网站了。


可以发现,在有了SpringSecurity之后,我们网站的登录验证模块相当于直接被接管了,因此,从现在开始,我们的网站不需要再自己编写登录模块了,这里我们可以直接去掉,只留下主页面:
@Controller
public class HelloController {

    //现在所有接口不需要任何验证了,因为Security已经帮我们做了,没登录是根本进不来的
    @GetMapping("/")
    public String index(){
        return "index";
    }

    @ResponseBody
    @PostMapping("/pay")
    public JSONObject pay(@RequestParam String account){
        JSONObject object = new JSONObject();
        System.out.println("转账给"+account+"成功,交易已完成!");
        object.put("success", true);
        return object;
    }
}

这样,我们的网站就成功用上了更加安全的SpringSecurity框架了。细心的小伙伴可能发现了,我们在配置用户信息的时候,报了黄标,实际上这种方式存储密码并不安全:

这是因为SpringSecurity的密码校验不推荐直接使用原文进行比较,而是使用加密算法将密码进行加密(更准确地说应该进行Hash处理,此过程是不可逆的,无法解密),最后将用户提供的密码以同样的方式加密后与密文进行比较。对于我们来说,用户提供的密码属于隐私信息,直接明文存储并不好,而且如果数据库内容被窃取,那么所有用户的密码将全部泄露,这是我们不希望看到的结果,我们需要一种既能隐藏用户密码也能完成认证的机制,而Hash处理就是一种很好的解决方案,通过将用户的密码进行Hash值计算,计算出来的结果一般是单向的,无法还原为原文,如果需要验证是否与此密码一致,那么需要以同样的方式加密再比较两个Hash值是否一致,这样就很好的保证了用户密码的安全性。
因此,我们在配置用户信息的时候,可以使用官方提供的BCrypt加密工具:
@Configuration
@EnableWebSecurity
public class SecurityConfiguration {

    //这里将BCryptPasswordEncoder直接注册为Bean,Security会自动进行选择
    @Bean
    public PasswordEncoder passwordEncoder(){
        return new BCryptPasswordEncoder();
    }

    @Bean
    public UserDetailsService userDetailsService(PasswordEncoder encoder) {
        UserDetails user = User
                .withUsername("user")
                .password(encoder.encode("password"))   //这里将密码进行加密后存储
                .roles("USER")
                .build();
        System.out.println(encoder.encode("password"));  //一会观察一下加密出来之后的密码长啥样
        UserDetails admin = User
                .withUsername("admin")
                .password(encoder.encode("password"))   //这里将密码进行加密后存储
                .roles("ADMIN", "USER")
                .build();
        return new InMemoryUserDetailsManager(user, admin);
    }
}
这样,我们存储的密码就是更加安全的密码了:


这样,一个简单的权限校验就配置完成了,是不是感觉用起来还是挺简单的?
不过,可能会有小伙伴发现,所有的POST请求都被403了:


这是因为SpringSecurity自带了csrf防护,需求我们在POST请求中携带页面中的csrfToken才可以,否则一律进行拦截操作,这里我们可以将其嵌入到页面中,随便找一个地方添加以下内容:
接着在axios发起请求时,携带这个input的value值:
function pay() {
    const account = document.getElementById("account").value
    const csrf = document.getElementById("_csrf").value
    axios.post('/mvc/pay', {
        account: account,
        _csrf: csrf   //携带此信息即可,否则会被拦截
    }, {
      ...
如果后续各位小伙伴遇到那种需要再form表单中提交的情况,也可以直接像下面这样给塞到表单里:
<form action="/xxxx" method="post">
    ...
    <input type="text" th:name="${_csrf.getParameterName()}" th:value="${_csrf.token}" hidden>
    ...
</form>
实际上现在的浏览器已经很安全了,完全不需要使用自带的csrf防护,后面我们会讲解如何通过配置关闭csrf防护。这里温馨提醒一下,在后续各位小伙伴跟我们的实战项目时,如果遇到诸如401、403这种错误时,优先查看你的SpringSecurity配置是否错误。
从Spring Security 4.0开始,默认情况下会启用CSRF保护,以防止CSRF攻击应用程序,Spring Security CSRF会针对PATCH,POST,PUT和DELETE方法的请求(不仅仅只是登陆请求,这里指的是任何请求路径)进行防护,而这里的登陆表单正好是一个POST类型的请求。在默认配置下,无论是否登陆,页面中只要发起了PATCH,POST,PUT和DELETE请求一定会被拒绝,并返回403错误(注意,这里是个究极大坑,这个没有任何提示,直接403,因此如果你不知道的话根本不清楚是什么问题,就一直卡这里了),需要在请求的时候加入csrfToken才行,也就是"83421936-b84b-44e3-be47-58bb2c14571a",正是csrfToken,如果提交的是表单类型的数据,那么表单中必须包含此Token字符串,键名称为"_csrf";如果是JSON数据格式发送的,那么就需要在请求头中包含此Token字符串。


基于数据库验证
前面我们已经实现了直接认证的方式,但是实际项目中往往都是将用户信息存储在数据库中,那么如何将其连接到数据库,通过查询数据库中的用户信息来进行用户登录呢?
官方默认提供了可以直接使用的用户和权限表设计,根本不需要我们来建表,直接在Navicat中执行以下查询:
create table users(username varchar(50) not null primary key,password varchar(500) not null,enabled boolean not null);
create table authorities (username varchar(50) not null,authority varchar(50) not null,constraint fk_authorities_users foreign key(username) references users(username));
create unique index ix_auth_username on authorities (username,authority);


接着我们添加Mybatis和MySQL相关的依赖:
<dependency>
    <groupId>org.mybatis</groupId>
    <artifactId>mybatis</artifactId>
    <version>3.5.13</version>
</dependency>
<dependency>
    <groupId>org.mybatis</groupId>
    <artifactId>mybatis-spring</artifactId>
    <version>3.0.2</version>
</dependency>
<dependency>
    <groupId>com.mysql</groupId>
    <artifactId>mysql-connector-j</artifactId>
    <version>8.0.31</version>
</dependency>
<dependency>
    <groupId>org.springframework</groupId>
    <artifactId>spring-jdbc</artifactId>
    <version>6.0.10</version>
</dependency>
接着我们编写配置类:
@Configuration
@EnableWebSecurity
public class SecurityConfiguration {

    @Bean
    public PasswordEncoder passwordEncoder(){
        return new BCryptPasswordEncoder();
    }

    @Bean
    public DataSource dataSource(){
        //数据源配置
        return new PooledDataSource("com.mysql.cj.jdbc.Driver",
                "jdbc:mysql://localhost:3306/test", "root", "123456");
    }

    @Bean
    public UserDetailsService userDetailsService(DataSource dataSource,
                                                 PasswordEncoder encoder) {
        JdbcUserDetailsManager manager = new JdbcUserDetailsManager(dataSource);
        //仅首次启动时创建一个新的用户用于测试,后续无需创建
            manager.createUser(User.withUsername("user")
                      .password(encoder.encode("password")).roles("USER").build());
        return manager;
    }
}
启动后,可以看到两张表中已经自动添加好对应的数据了:


clean if problem


我们可以直接尝试进行登录,使用方式和之前是完全一样的:

这样,当我们下次需要快速创建一个用户登录的应用程序时,直接使用这种方式就能快速完成了,是不是感觉特别方便。
无论是我们上节课认识的InMemoryUserDetailsManager还是现在认识的JdbcUserDetailsManager,他们都是实现自UserDetailsManager接口,这个接口中有着一套完整的增删改查操作,方便我们直接对用户进行处理:
public interface UserDetailsManager extends UserDetailsService {

  //创建一个新的用户
    void createUser(UserDetails user);

  //更新用户信息
    void updateUser(UserDetails user);

  //删除用户
    void deleteUser(String username);

  //修改用户密码
    void changePassword(String oldPassword, String newPassword);

  //判断是否存在指定用户
    boolean userExists(String username);
}
通过使用UserDetailsManager对象,我们就能快速执行用户相关的管理操作,比如我们可以直接在网站上添加一个快速重置密码的接口,首先需要配置一下JdbcUserDetailsManager,为其添加一个AuthenticationManager用于原密码的校验:
@Configuration
@EnableWebSecurity
public class SecurityConfiguration {

    ...

    //手动创建一个AuthenticationManager用于处理密码校验
    private AuthenticationManager authenticationManager(UserDetailsManager manager,
                                                        PasswordEncoder encoder){
        DaoAuthenticationProvider provider = new DaoAuthenticationProvider();
        provider.setUserDetailsService(manager);
        provider.setPasswordEncoder(encoder);
        return new ProviderManager(provider);
    }

    @Bean
    public UserDetailsManager userDetailsService(DataSource dataSource,
                                                 PasswordEncoder encoder) throws Exception {
        JdbcUserDetailsManager manager = new JdbcUserDetailsManager(dataSource);
        //为UserDetailsManager设置AuthenticationManager即可开启重置密码的时的校验
        manager.setAuthenticationManager(authenticationManager(manager, encoder));
        return manager;
    }
}
接着我们编写一个快速重置密码的接口:
@ResponseBody
@PostMapping("/change-password")
public JSONObject changePassword(@RequestParam String oldPassword,
                                 @RequestParam String newPassword) {
    manager.changePassword(oldPassword, encoder.encode(newPassword));
    JSONObject object = new JSONObject();
    object.put("success", true);
    return object;
}
接着我们在主界面中添加一个重置密码的操作:
<div>
    <label>
        修改密码:
        <input type="text" id="oldPassword" placeholder="旧密码"/>
        <input type="text" id="newPassword" placeholder="新密码"/>
    </label>
    <button onclick="change()">修改密码</button>
</div>
function change() {
    const oldPassword = document.getElementById("oldPassword").value
    const newPassword = document.getElementById("newPassword").value
    const csrf = document.getElementById("_csrf").value
    axios.post('/mvc/change-password', {
        oldPassword: oldPassword,
        newPassword: newPassword,
        _csrf: csrf
    }, {
        headers: {
            'Content-Type': 'application/x-www-form-urlencoded'
        }
    }).then(({data}) => {
        alert(data.success ? "密码修改成功" : "密码修改失败,请检查原密码是否正确")
    })
}
这样我们就可以在首页进行修改密码操作了:

当然,这种方式的权限校验虽然能够直接使用数据库,但是存在一定的局限性,只适合快速搭建Demo使用,不适合实际生产环境下编写,下一节我们将介绍如何实现自定义验证,以应对各种情况。
if show this, please check whether duplicate bean.
Don't forget to clean.


自定义验证
有些时候,我们的数据库可能并不会像SpringSecurity默认的那样进行设计,而是采用自定义的表结构,这种情况下,上面两种方式就很难进行验证了,此时我们得编写自定义验证,来应对各种任意变化的情况。
既然需要自定义,那么我们就需要自行实现UserDetailsService或是功能更完善的UserDetailsManager接口,这里为了简单,我们直接选择前者进行实现:
@Service
public class AuthorizeService implements UserDetailsService {

    @Override
    public UserDetails loadUserByUsername(String username) throws UsernameNotFoundException {
        return null;
    }
}
现在我们需要去实现这个loadUserByUsername方法,表示在验证的时候通过自定义的方式,根据给定的用户名查询用户,并封装为UserDetails对象返回,然后由SpringSecurity将我们返回的对象与用户登录的信息进行核验,基本流程实际上跟之前是一样的,只是现在由我们自己来提供用户查询方式。
现在我们在数据库中创建一个自定义的用户表:

随便插入一点数据:


接着我们自行编写对应的查询操作,首先创建一个对应的实体类:
然后是根据用户名查询用户的Mapper接口:
public interface UserMapper {
    @Select("select * from user where username = #{username}")
    Account findUserByName(String username);
}
最后我们在配置类上添加相应的包扫描:
@EnableWebMvc
@Configuration
@ComponentScans({
        @ComponentScan("com.example.controller"),
        @ComponentScan("com.example.service")
})
@MapperScan("com.example.mapper")
public class WebConfiguration implements WebMvcConfigurer {
    ...
}
然后我们来到Service这边进行一下完善,从数据库中进行查询:
@Service
public class AuthorizeService implements UserDetailsService {

    @Resource
    UserMapper mapper;

    @Override
    public UserDetails loadUserByUsername(String username) throws UsernameNotFoundException {
        Account account = mapper.findUserByName(username);
        if(account == null)
            throw new UsernameNotFoundException("用户名或密码错误");
        return User
                .withUsername(username)
                .password(account.getPassword())
                .build();
    }
}
这样,我们就通过自定义的方式实现了数据库信息查询,并完成用户登录操作。


其他配置
前面我们介绍了如果将SpringSecurity作为我们的登录校验框架,并且实现了三种方式的校验,但是光是这样,自由度还远远不够,在实际开发场景中,我们还会面对各种各样的需求,这一部分我们接着来进行更加深层次的配置。
自定义登录界面
虽然SpringSecurity为我们提供了一个还行的登录界面,但是很多情况下往往都是我们使用自定义的登录界面,这个时候就需要进行更多的配置了,我们还是以之前图书管理系统使用的模版为例。
下载好模版后,我们将其中的两个页面和资源文件放到类路径下:

WebConfiguration.java
    @Override
    public void configureMessageConverters(List<HttpMessageConverter<?>> converters) {
        converters.add(new FastJsonHttpMessageConverter());
    }

    @Override
    public void addResourceHandlers(ResourceHandlerRegistry registry) {
        registry.addResourceHandler("/static/**").addResourceLocations("classpath:/static/");
    }
接着我们配置对应页面的Controller控制器:
@Controller
public class HelloController {
    @GetMapping("/")
    public String index(){
        return "index";
    }

    @GetMapping("/login")
    public String login(){
        return "login";
    }
}

这样,我们在登录之后,就可以展示前端模版页面了:
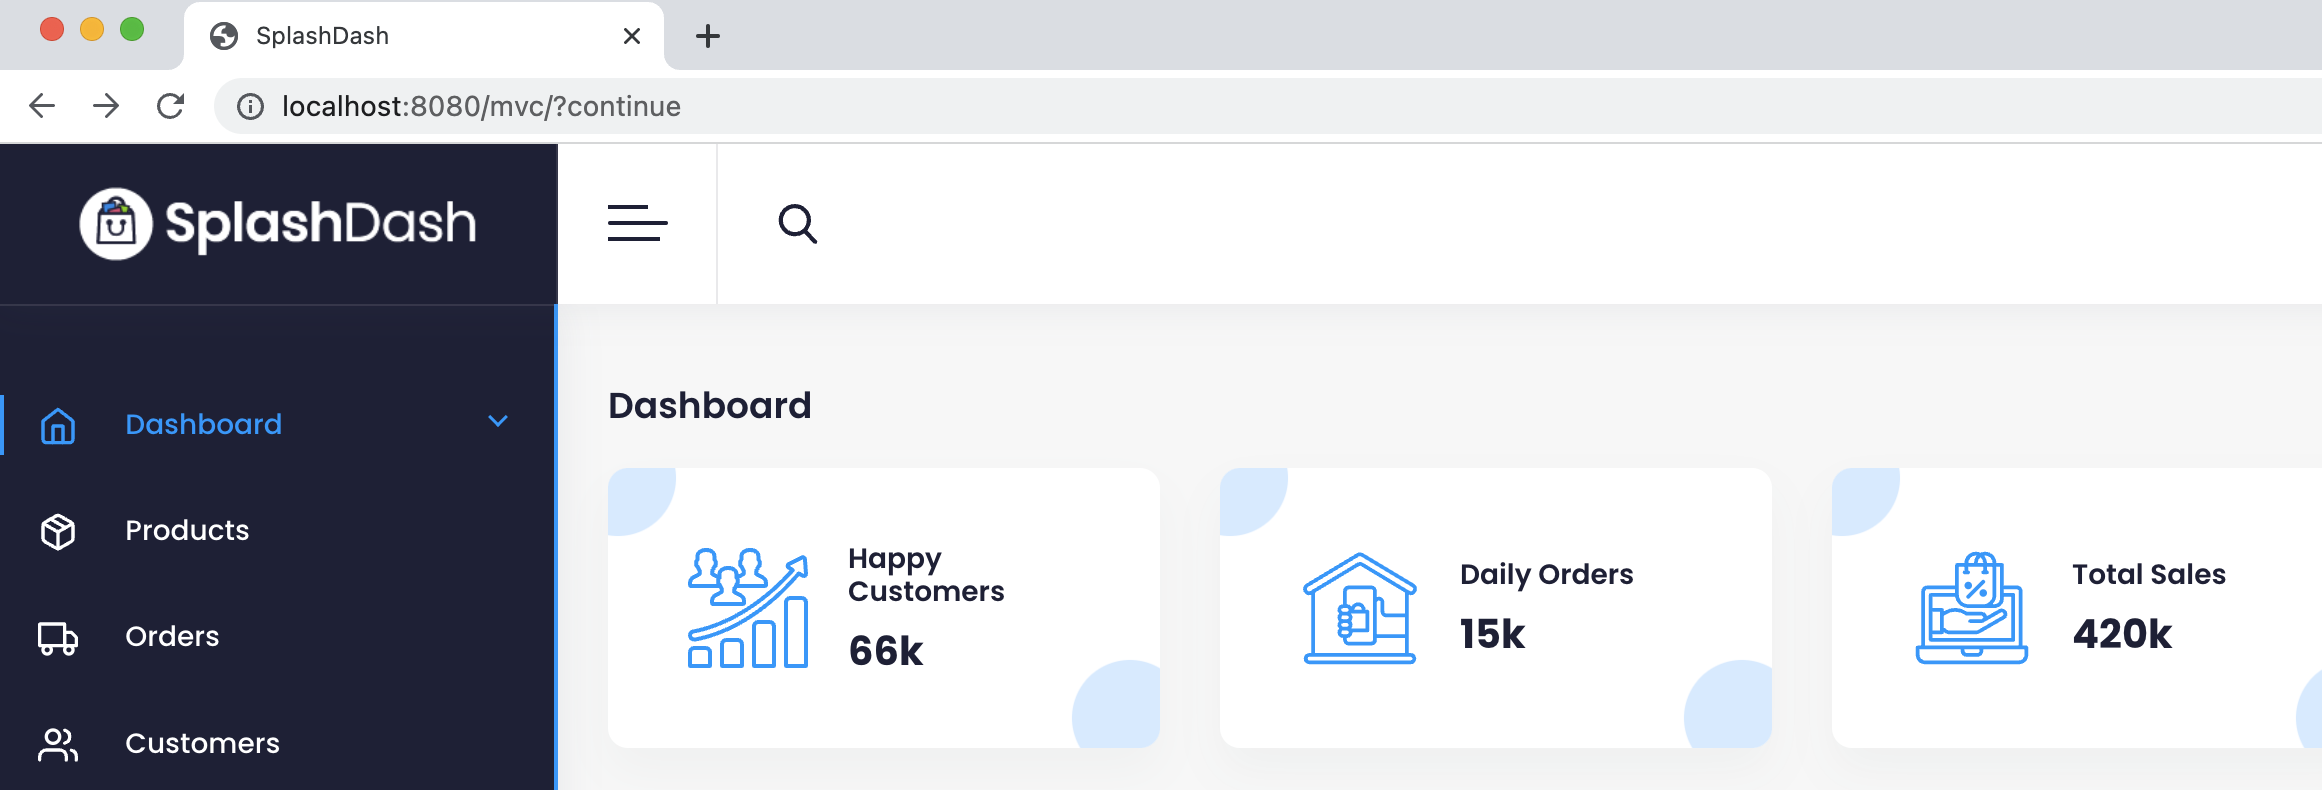

不过现在依然是默认进入到SpringSecurity默认的登录界面,现在我们来配置自定义的登录界面,将我们的前端模版中的登录页面作为SpringSecurity的默认登录界面。
@Configuration
@EnableWebSecurity
public class SecurityConfiguration {

    ...

        //如果你学习过SpringSecurity 5.X版本,可能会发现新版本的配置方式完全不一样
    //新版本全部采用lambda形式进行配置,无法再使用之前的and()方法进行连接了
    @Bean
    public SecurityFilterChain filterChain(HttpSecurity http) throws Exception {
        return http
                //以下是验证请求拦截和放行配置
                .authorizeHttpRequests(auth -> {
                    auth.anyRequest().authenticated();    //将所有请求全部拦截,一律需要验证
                })
                //以下是表单登录相关配置
                .formLogin(conf -> {
                    conf.loginPage("/login");   //将登录页设置为我们自己的登录页面
                    conf.loginProcessingUrl("/doLogin"); //登录表单提交的地址,可以自定义
                    conf.defaultSuccessUrl("/");   //登录成功后跳转的页面
                    conf.permitAll();    //将登录相关的地址放行,否则未登录的用户连登录界面都进不去
                    //用户名和密码的表单字段名称,不过默认就是这个,可以不配置,除非有特殊需求
                    conf.usernameParameter("username");
                    conf.passwordParameter("password");
                })
                .build();
    }
}

需要配置登陆页面的地址和登陆请求发送的地址,这里登陆页面填写为/login,登陆请求地址为/doLogin,登陆页面我们刚刚已经自己编写Controller来实现了,登陆请求提交处理由SpringSecurity提供,只需要写路径就可以了。现在访问我们的网站,就可以进入到自定义的登录界面了:


但是我们发现,我们的页面只有一个纯文本,这是因为在获取静态资源的时候,所有的静态资源默认情况下也会被拦截,因此全部被302重定向到登录页面,这显然是不对的:


因此,现在我们需要将所有的静态资源也给放行,否则登录界面都没法正常展示:
.authorizeHttpRequests(auth -> {
      auth.requestMatchers("/static/**").permitAll();   //将所有的静态资源放行,一定要添加在全部请求拦截之前
      auth.anyRequest().authenticated();    //将所有请求全部拦截,一律需要验证
})

再次访问我们的网站,就可以看到正常显示的登录界面了:
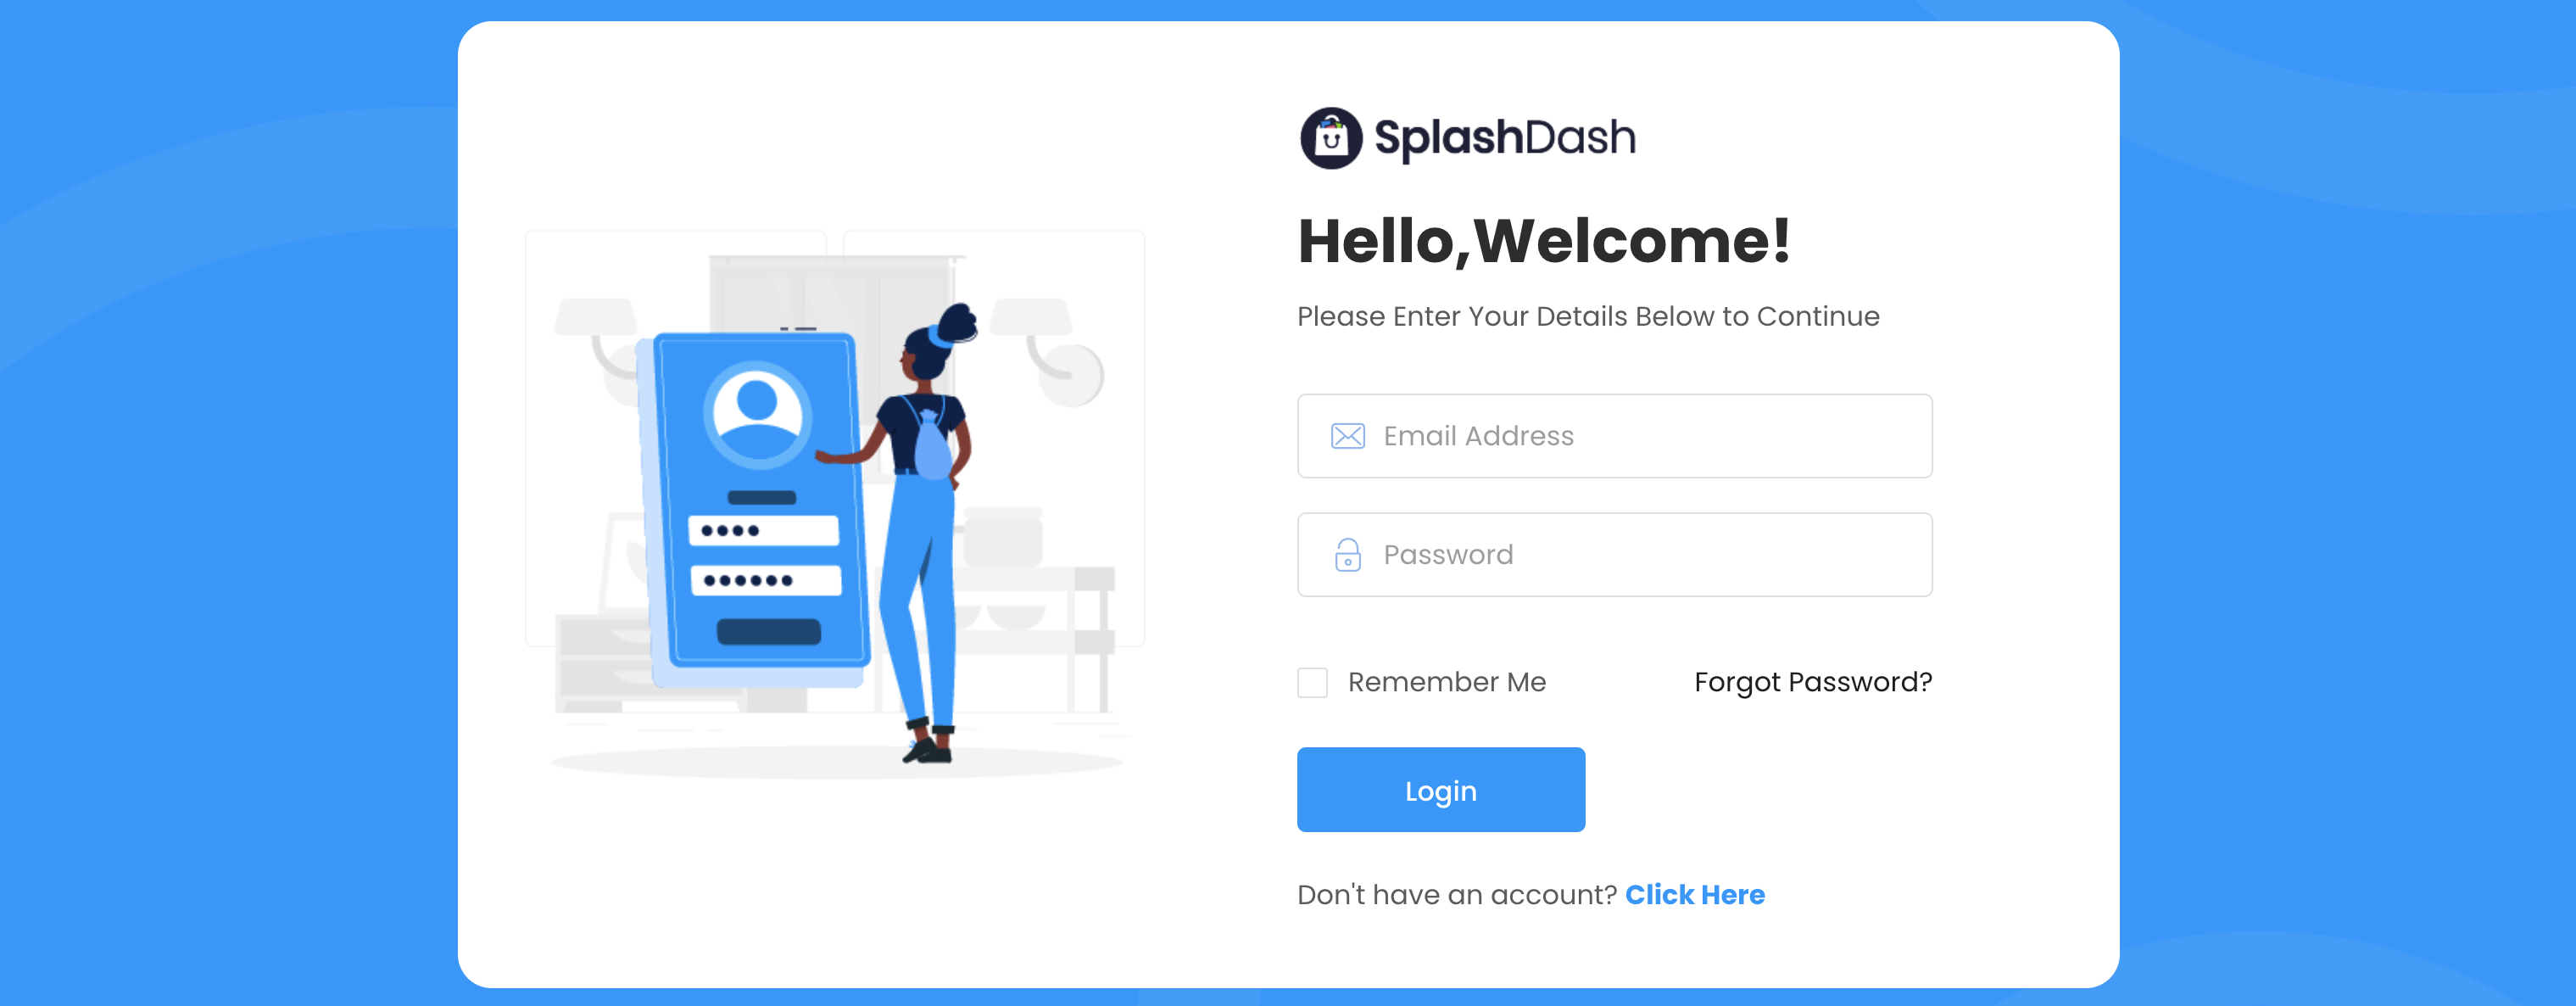

因此,如果各位小伙伴后续在编写项目过程中发现有302的情况,一定要先检查是否因为没有放行导致被SpringSecurity给拦截了,别再遇到302一脸懵逼了。
接着我们来配置登录操作,这里我们只需要配置一下登录的地址和登录按钮即可,当然,跟之前一样,要把CSRF的输入框也加上:
<form action="doLogin" method="post">
        ...
  <input type="text" name="username" placeholder="Email Address" class="ad-input">
  ...
  <input type="password" name="password" placeholder="Password" class="ad-input">
  ...
  <input type="text" th:name="${_csrf.getParameterName()}" th:value="${_csrf.token}" hidden>
  <div class="ad-auth-btn">
     <button type="submit" class="ad-btn ad-login-member">Login</button>
  </div>
    ...
</form>


接着我们就可以尝试进行登录操作了:

可以看到,现在我们可以成功地登录到主页了。
退出登录也是同样的操作,我们只需要稍微进行一下配置就可以实现,我们首先继续完善配置类:
@Configuration
@EnableWebSecurity
public class SecurityConfiguration {

    ...

    @Bean
    public SecurityFilterChain filterChain(HttpSecurity http) throws Exception {
        return http
                ...
                //以下是退出登录相关配置
                .logout(conf -> {
                    conf.logoutUrl("/doLogout");   //退出登录地址,跟上面一样可自定义
                    conf.logoutSuccessUrl("/login");  //退出登录成功后跳转的地址,这里设置为登录界面
                    conf.permitAll();
                })
                .build();
    }
}
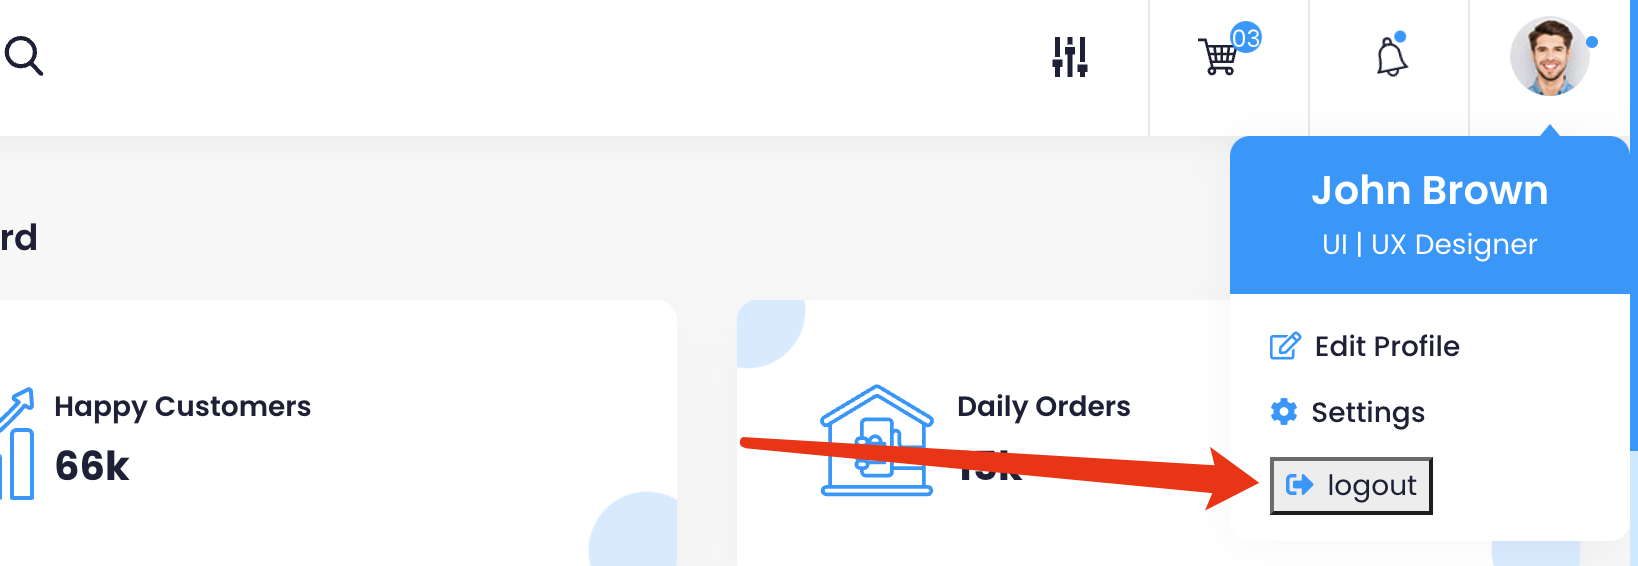
接着我们来稍微魔改一下页面中的退出登录按钮:
<li>
   <form action="doLogout" method="post">
        <input type="text" th:name="${_csrf.getParameterName()}" th:value="${_csrf.token}" hidden>
        <button type="submit">
           <i class="fas fa-sign-out-alt"></i> logout
        </button>
   </form>
</li>
现在我们点击右上角的退出按钮就可以退出了:

不过,可能会有小伙伴觉得,我们现在无论提交什么请求都需要Csrf校验,有些太麻烦了,实际上现在浏览器已经很安全了,没必要防御到这种程度,我们也可以直接在配置中关闭csrf校验:
@Configuration
@EnableWebSecurity
public class SecurityConfiguration {

    ...

    @Bean
    public SecurityFilterChain filterChain(HttpSecurity http) throws Exception {
        return http
                ...
                //以下是csrf相关配置
                .csrf(conf -> {
                    conf.disable();   //此方法可以直接关闭全部的csrf校验,一步到位
                    conf.ignoringRequestMatchers("/xxx/**");   //此方法可以根据情况忽略某些地址的csrf校验
                })
                .build();
    }
}
这样,我们就不需要再往页面中嵌入CSRF相关的输入框了,发送请求时也不会进行校验,至此,我们就完成了简单的自定义登录界面配置。


记住我功能
我们的网站还有一个重要的功能,就是记住我,也就是说我们可以在登陆之后的一段时间内,无需再次输入账号和密码进行登陆,相当于服务端已经记住当前用户,再次访问时就可以免登陆进入,这是一个非常常用的功能。
我们之前在JavaWeb阶段,使用本地Cookie存储的方式实现了记住我功能,但是这种方式并不安全,同时在代码编写上也比较麻烦,那么能否有一种更加高效的记住我功能实现呢?
SpringSecurity为我们提供了一种优秀的实现,它为每个已经登陆的浏览器分配一个携带Token的Cookie,并且此Cookie默认会被保留14天,只要我们不清理浏览器的Cookie,那么下次携带此Cookie访问服务器将无需登陆,直接继续使用之前登陆的身份,这样显然比我们之前的写法更加简便。并且我们需要进行简单配置,即可开启记住我功能:
@Configuration
@EnableWebSecurity
public class SecurityConfiguration {

    ...

    @Bean
    public SecurityFilterChain filterChain(HttpSecurity http) throws Exception {
        return http
                ...
                .rememberMe(conf -> {
                    conf.alwaysRemember(false);  //这里不要开启始终记住,我们需要配置为用户自行勾选
                    conf.rememberMeParameter("remember-me");   //记住我表单字段,默认就是这个,可以不配置
                    conf.rememberMeCookieName("xxxx");  //记住我设置的Cookie名字,也可以自定义,不过没必要
                })
                .build();
    }
}
配置完成后,我们需要修改一下前端页面中的表单,将记住我勾选框也作为表单的一部分进行提交:
<div class="ad-checkbox">
    <label>
        <input type="checkbox" name="remember-me" class="ad-checkbox">
        <span>Remember Me</span>
    </label>
</div>
接着我们来尝试勾选记住我选项进行登录:


此时提交的表单中就已经包含记住我字段了,我们会发现,服务端返回给我们了一个记住我专属的Cookie信息:

这个Cookie信息的过期时间并不是仅会话,而是默认保存一段时间,因此,我们关闭浏览器后下次再次访问网站时,就不需要我们再次进行登录操作了,而是直接继续上一次的登录状态。


当然,由于记住我信息是存放在内存中的,我们需要保证服务器一直处于运行状态,如果关闭服务器的话,记住我信息会全部丢失,因此,如果我们希望记住我能够一直持久化保存,我们就需要进一步进行配置。我们需要创建一个基于JDBC的TokenRepository实现:
@Bean
public PersistentTokenRepository tokenRepository(DataSource dataSource){
    JdbcTokenRepositoryImpl repository = new JdbcTokenRepositoryImpl();
    //在启动时自动在数据库中创建存储记住我信息的表,仅第一次需要,后续不需要
    repository.setCreateTableOnStartup(true);
    repository.setDataSource(dataSource);
    return repository;
}
然后添加此仓库:
.rememberMe(conf -> {
     conf.rememberMeParameter("remember-me");
     conf.tokenRepository(repository);      //设置刚刚的记住我持久化存储库
     conf.tokenValiditySeconds(3600 * 7);   //设置记住我有效时间为7天
})
这样,我们就成功配置了数据库持久化存储记住我信息,即使我们重启服务器也不会导致数据丢失。当我们登录之后,数据库中会自动记录相关的信息:

这样,我们网站的登录系统就更加完善了。


授权
用户登录后,可能会根据用户当前是身份进行角色划分,比如我们最常用的QQ,一个QQ群里面,有群主、管理员和普通群成员三种角色,其中群主具有最高权限,群主可以管理整个群的任何板块,并且具有解散和升级群的资格,而管理员只有群主的一部分权限,只能用于日常管理,普通群成员则只能进行最基本的聊天操作。
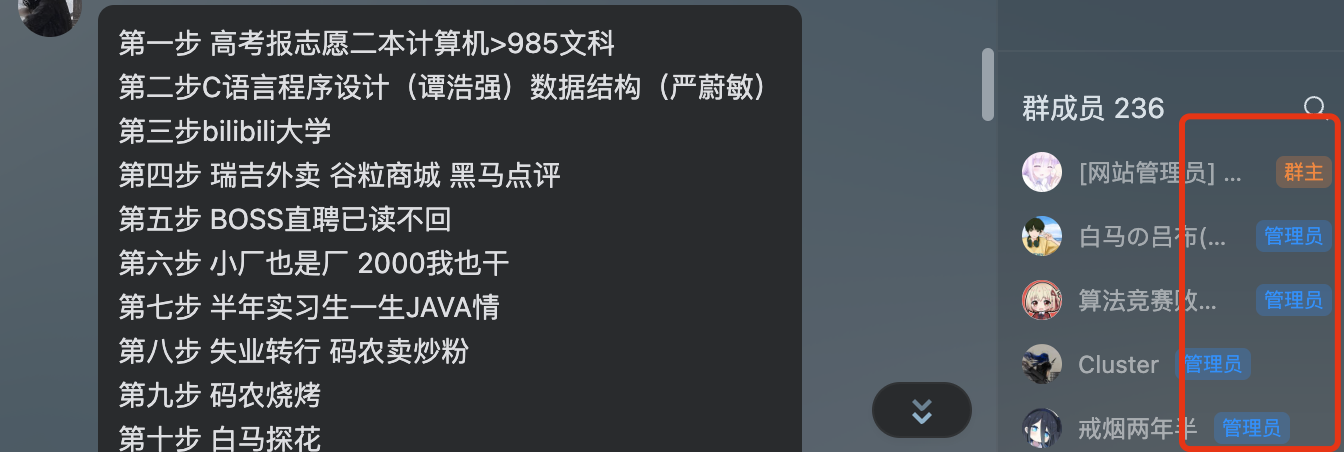
对于我们来说,用户的一个操作实际上就是在访问我们提供的接口(编写的对应访问路径的Servlet),比如登陆,就需要调用/login接口,退出登陆就要调用/logout接口,而我们之前的图书管理系统中,新增图书、删除图书,所有的操作都有着对应的Servlet来进行处理。因此,从我们开发者的角度来说,决定用户能否使用某个功能,只需要决定用户是否能够访问对应的Servlet即可。
我们可以大致像下面这样进行划分:
- 群主:
/login、/logout、/chat、/edit、/delete、/upgrade - 管理员:
/login、/logout、/chat、/edit - 普通群成员:
/login、/logout、/chat
也就是说,我们需要做的就是指定哪些请求可以由哪些用户发起。
SpringSecurity为我们提供了两种授权方式:
- 基于权限的授权:只要拥有某权限的用户,就可以访问某个路径。
- 基于角色的授权:根据用户属于哪个角色来决定是否可以访问某个路径。
两者只是概念上的不同,实际上使用起来效果差不多。这里我们就先演示以角色方式来进行授权。
基于角色授权
现在我们希望创建两个角色,普通用户和管理员,普通用户只能访问index页面,而管理员可以访问任何页面。
首先我们需要对数据库中的角色表进行一些修改,添加一个用户角色字段,并创建一个新的用户,Test用户的角色为user,而Admin用户的角色为admin。

接着我们需要配置SpringSecurity,决定哪些角色可以访问哪些页面:
.authorizeHttpRequests(auth -> {
    //静态资源依然全部可以访问
    auth.requestMatchers("/static/**").permitAll();
    //只有具有以下角色的用户才能访问路径"/"
    auth.requestMatchers("/").hasAnyRole("user", "admin");
    //其他所有路径必须角色为admin才能访问
    auth.anyRequest().hasRole("admin");
})

接着我们需要稍微修改一下验证逻辑,我们在数据库中的用户表上添加一个新的字段,用于表示角色:

修改一下对应的实体类:
现在我们在查询用户时,需要添加其对应的角色:
 @Override
public UserDetails loadUserByUsername(String username) throws UsernameNotFoundException {
    Account account = mapper.findUserByName(username);
    if(account == null)
        throw new UsernameNotFoundException("用户名或密码错误");
    return User
            .withUsername(username)
            .password(account.getPassword())
            .roles(account.getRole())   //添加角色,一个用户可以有一个或多个角色
            .build();
}
这样就可以了,我们重启服务器登录看看:

目前依然是可以正常登录的,但是我们随便访问一个其他的页面,就会被拦截并自动退回到登录界面:

这是因为我们前面配置的是user角色,那么这个角色只能访问首页,其他的都不行,所以就会被自动拦截掉了。现在我们可以到数据库中对这个用户的角色进行修改,看看修改后是否能够访问到其他页面:

这样就可以访问其他页面不会被拦截了,不过因为我们没配置这个路径,所以出来的是404页面。
通过使用角色控制页面的访问,我们就可以让某些用户只能访问部分页面。
user:

admin:

基于权限授权
基于权限的授权与角色类似,需要以hasAnyAuthority或hasAuthority进行判断:
.authorizeHttpRequests(auth -> {
    //静态资源依然全部可以访问
    auth.requestMatchers("/static/**").permitAll();
    //基于权限和基于角色其实差别并不大,使用方式是相同的
    auth.anyRequest().hasAnyAuthority("page:index");
})
实际上权限跟角色相比只是粒度更细,由于使用方式差不多,这里不多做阐述。
使用注解权限判断
除了直接配置以外,我们还可以以注解形式直接配置,首先需要在配置类(注意这里是在Mvc的配置类上添加,因为这里只针对Controller进行过滤,所有的Controller是由Mvc配置类进行注册的,如果需要为Service或其他Bean也启用权限判断,则需要在Security的配置类上添加)上开启:
@Configuration
@EnableWebSecurity
@EnableMethodSecurity   //开启方法安全校验
public class SecurityConfiguration {
    ...
}
现在我们就可以在我们想要进行权限校验的方法上添加注解了:
@Controller
public class HelloController {
    @PreAuthorize("hasRole('user')")  //直接使用hasRole方法判断是否包含某个角色
    @GetMapping("/")
    public String index(){
        return "index";
    }

    ...
}
通过添加@PreAuthorize注解,在执行之前判断判断权限,如果没有对应的权限或是对应的角色,将无法访问页面。

user:

admin:

这里其实是使用的就是我们之前讲解的SpEL表达式,我们可以直接在这里使用权限判断相关的方法,如果有忘记SpEL如何使用的可以回顾我们的Spring6核心篇。所有可以进行权限判断的方法在SecurityExpressionRoot类中有定义,各位小伙伴可以自行前往查看。
同样的还有@PostAuthorize注解,但是它是在方法执行之后再进行拦截:
@PostAuthorize("hasRole('user')")
@RequestMapping("/")
public String index(){
    System.out.println("执行了");
    return "index";
}
除了Controller以外,只要是由Spring管理的Bean都可以使用注解形式来控制权限,我们可以在任意方法上添加这个注解,只要不具备表达式中指定的访问权限,那么就无法执行方法并且会返回403页面。
@Service
public class UserService {

    @PreAuthorize("hasAnyRole('user')")
    public void test(){
        System.out.println("成功执行");
    }
}
与具有相同功能的还有@Secured但是它不支持SpEL表达式的权限表示形式,并且需要添加"ROLE_"前缀,这里就不做演示了。

admin:

我们还可以使用@PreFilter和@PostFilter对集合类型的参数或返回值进行过滤。
比如:
@PreFilter("filterObject.equals('lbwnb')")   //filterObject代表集合中每个元素,只要满足条件的元素才会留下
public void test(List<String> list){
    System.out.println("成功执行"+list);
}
@RequestMapping("/")
public String index(){
    List<String> list = new LinkedList<>();
    list.add("lbwnb");
    list.add("yyds");
    service.test(list);
    return "index";
}
与@PreFilter类似的@PostFilter这里就不做演示了,它用于处理返回值,使用方法是一样的。

当有多个集合时,需要使用filterTarget进行指定:
@PreFilter(value = "filterObject.equals('lbwnb')", filterTarget = "list2")
public void test(List<String> list, List<String> list2){
    System.out.println("成功执行"+list);
}
至此,有关Security的基本功能,我们就全部介绍完毕了,在后面的SpringBoot阶段,我们还会继续深入使用此框架,实现更多高级的功能。
内部机制探究
授权校验流程
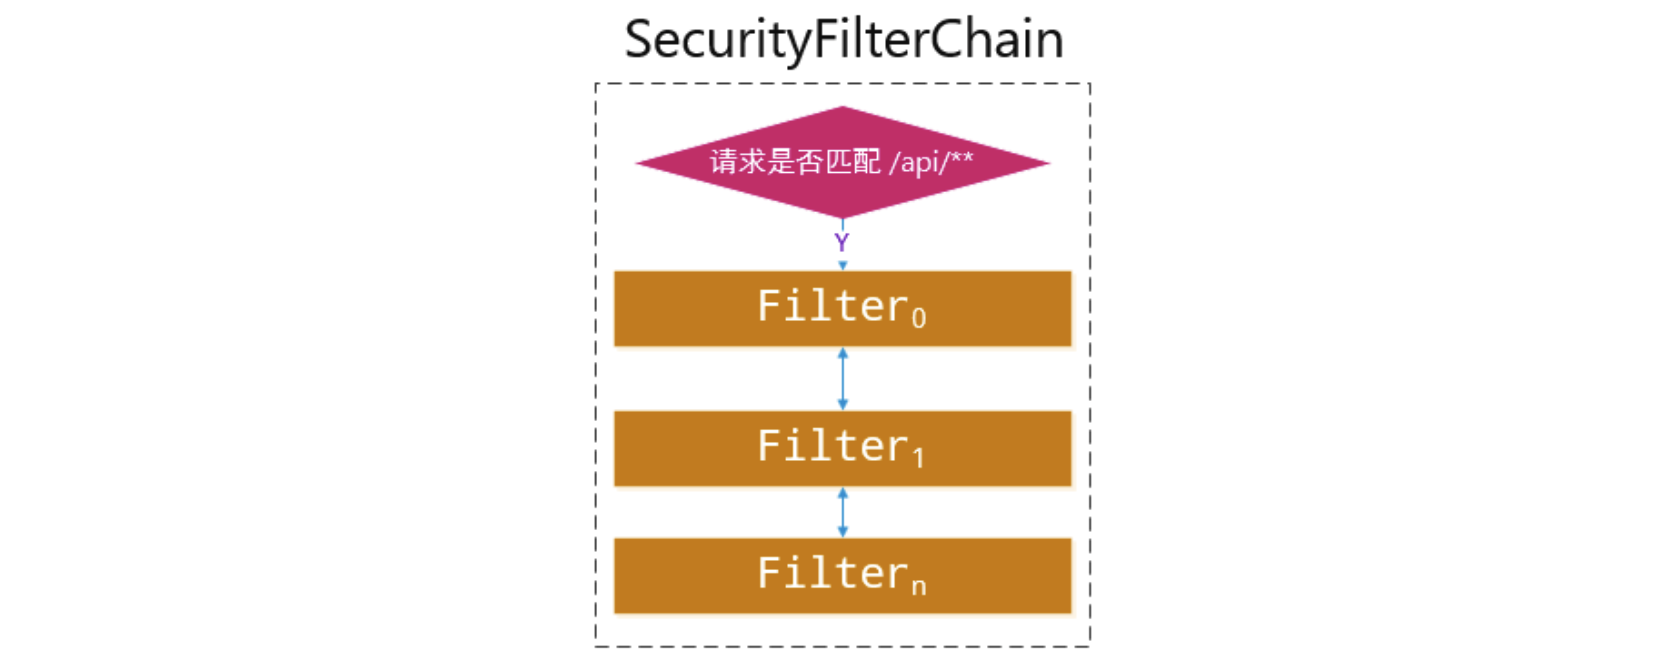
最后我们再来聊一下SpringSecurity的实现原理,它本质上是依靠N个Filter实现的,也就是一个完整的过滤链(注意这里是过滤器,不是拦截器)
我们就从AbstractSecurityWebApplicationInitializer开始下手,我们来看看它配置了什么:
//此方法会在启动时被调用
public final void onStartup(ServletContext servletContext) {
    this.beforeSpringSecurityFilterChain(servletContext);
    if (this.configurationClasses != null) {
        AnnotationConfigWebApplicationContext rootAppContext = new AnnotationConfigWebApplicationContext();
        rootAppContext.register(this.configurationClasses);
        servletContext.addListener(new ContextLoaderListener(rootAppContext));
    }

    if (this.enableHttpSessionEventPublisher()) {
        servletContext.addListener("org.springframework.security.web.session.HttpSessionEventPublisher");
    }

    servletContext.setSessionTrackingModes(this.getSessionTrackingModes());
    //重点在这里,这里插入了关键的FilterChain
    this.insertSpringSecurityFilterChain(servletContext);
    this.afterSpringSecurityFilterChain(servletContext);
}
private void insertSpringSecurityFilterChain(ServletContext servletContext) {
    String filterName = "springSecurityFilterChain";
    //创建了一个DelegatingFilterProxy对象,它本质上也是一个Filter,但是是多个Filter的集合
    DelegatingFilterProxy springSecurityFilterChain = new DelegatingFilterProxy(filterName);
    String contextAttribute = this.getWebApplicationContextAttribute();
    if (contextAttribute != null) {
        springSecurityFilterChain.setContextAttribute(contextAttribute);
    }
        //通过ServletContext注册DelegatingFilterProxy这个Filter
    this.registerFilter(servletContext, true, filterName, springSecurityFilterChain);
}
我们接着来看看,DelegatingFilterProxy在做什么:
//这个是初始化方法,它由GenericFilterBean(父类)定义,在afterPropertiesSet方法中被调用
protected void initFilterBean() throws ServletException {
    synchronized(this.delegateMonitor) {
        if (this.delegate == null) {
            if (this.targetBeanName == null) {
                this.targetBeanName = this.getFilterName();
            }

            WebApplicationContext wac = this.findWebApplicationContext();
            if (wac != null) {
                //耐心点,套娃很正常
                this.delegate = this.initDelegate(wac);
            }
        }

    }
}
protected Filter initDelegate(WebApplicationContext wac) throws ServletException {
    String targetBeanName = this.getTargetBeanName();
    Assert.state(targetBeanName != null, "No target bean name set");
    //这里通过WebApplicationContext获取了一个Bean
    Filter delegate = (Filter)wac.getBean(targetBeanName, Filter.class);
    if (this.isTargetFilterLifecycle()) {
        delegate.init(this.getFilterConfig());
    }

    //返回Filter
    return delegate;
}
这里我们需要添加一个断点来查看到底获取到了什么Bean。
通过断点调试,我们发现这里放回的对象是一个FilterChainProxy类型的,并且调用了它的初始化方法。
我们倒回去看,当Filter返回之后,DelegatingFilterProxy的一个成员变量delegate被赋值为得到的Filter,也就是FilterChainProxy对象,接着我们来看看,DelegatingFilterProxy是如何执行doFilter方法的。
public void doFilter(ServletRequest request, ServletResponse response, FilterChain filterChain) throws ServletException, IOException {
    Filter delegateToUse = this.delegate;
    if (delegateToUse == null) {
        //非正常情况,这里省略...
    }
        //这里才是真正的调用,别忘了delegateToUse就是初始化的FilterChainProxy对象
    this.invokeDelegate(delegateToUse, request, response, filterChain);
}
protected void invokeDelegate(Filter delegate, ServletRequest request, ServletResponse response, FilterChain filterChain) throws ServletException, IOException {
  //最后实际上调用的是FilterChainProxy的doFilter方法
    delegate.doFilter(request, response, filterChain);
}
所以我们接着来看,FilterChainProxy的doFilter方法又在干什么:
public void doFilter(ServletRequest request, ServletResponse response, FilterChain chain) throws IOException, ServletException {
    boolean clearContext = request.getAttribute(FILTER_APPLIED) == null;
    if (!clearContext) {
        //真正的过滤在这里执行
        this.doFilterInternal(request, response, chain);
    } else {
        //...
    }
}
private void doFilterInternal(ServletRequest request, ServletResponse response, FilterChain chain) throws IOException, ServletException {
    FirewalledRequest firewallRequest = this.firewall.getFirewalledRequest((HttpServletRequest)request);
    HttpServletResponse firewallResponse = this.firewall.getFirewalledResponse((HttpServletResponse)response);
    //这里获取了一个Filter列表,实际上SpringSecurity就是由N个过滤器实现的,这里获取的都是SpringSecurity提供的过滤器
    //但是请注意,经过我们之前的分析,实际上真正注册的Filter只有DelegatingFilterProxy
    //而这里的Filter列表中的所有Filter并没有被注册,而是在这里进行内部调用
    List<Filter> filters = this.getFilters((HttpServletRequest)firewallRequest);
    //只要Filter列表不是空,就依次执行内置的Filter
    if (filters != null && filters.size() != 0) {
        if (logger.isDebugEnabled()) {
            logger.debug(LogMessage.of(() -> {
                return "Securing " + requestLine(firewallRequest);
            }));
        }
                //这里创建一个虚拟的过滤链,过滤流程是由SpringSecurity自己实现的
        FilterChainProxy.VirtualFilterChain virtualFilterChain = new FilterChainProxy.VirtualFilterChain(firewallRequest, chain, filters);
        //调用虚拟过滤链的doFilter
        virtualFilterChain.doFilter(firewallRequest, firewallResponse);
    } else {
        if (logger.isTraceEnabled()) {
            logger.trace(LogMessage.of(() -> {
                return "No security for " + requestLine(firewallRequest);
            }));
        }

        firewallRequest.reset();
        chain.doFilter(firewallRequest, firewallResponse);
    }
}
我们来看一下虚拟过滤链的doFilter是怎么处理的:
//看似没有任何循环,实际上就是一个循环,是一个递归调用
public void doFilter(ServletRequest request, ServletResponse response) throws IOException, ServletException {
    //判断是否已经通过全部的内置过滤器,定位是否等于当前大小
    if (this.currentPosition == this.size) {
        if (FilterChainProxy.logger.isDebugEnabled()) {
            FilterChainProxy.logger.debug(LogMessage.of(() -> {
                return "Secured " + FilterChainProxy.requestLine(this.firewalledRequest);
            }));
        }

        this.firewalledRequest.reset();
        //所有的内置过滤器已经完成,按照正常流程走DelegatingFilterProxy的下一个Filter
        //也就是说这里之后就与DelegatingFilterProxy没有任何关系了,该走其他过滤器就走其他地方配置的过滤器,SpringSecurity的过滤操作已经结束
        this.originalChain.doFilter(request, response);
    } else {
        //定位自增
        ++this.currentPosition;
        //获取当前定位的Filter
        Filter nextFilter = (Filter)this.additionalFilters.get(this.currentPosition - 1);
        if (FilterChainProxy.logger.isTraceEnabled()) {
            FilterChainProxy.logger.trace(LogMessage.format("Invoking %s (%d/%d)", nextFilter.getClass().getSimpleName(), this.currentPosition, this.size));
        }
                //执行内部过滤器的doFilter方法,传入当前对象本身作为Filter,执行如果成功,那么一定会再次调用当前对象的doFilter方法
        //可能最不理解的就是这里,执行的难道不是内部其他Filter的doFilter方法吗,怎么会让当前对象的doFilter方法递归调用呢?
        //没关系,下面我们接着了解了其中一个内部过滤器就明白了
        nextFilter.doFilter(request, response, this);
    }
}
因此,我们差不多已经了解了整个SpringSecurity的实现机制了,那么我们来随便看一个内部的过滤器在做什么。
比如用于处理登陆的过滤器UsernamePasswordAuthenticationFilter,它继承自AbstractAuthenticationProcessingFilter,我们来看看它是怎么进行过滤的:
public void doFilter(ServletRequest request, ServletResponse response, FilterChain chain) throws IOException, ServletException {
    this.doFilter((HttpServletRequest)request, (HttpServletResponse)response, chain);
}

private void doFilter(HttpServletRequest request, HttpServletResponse response, FilterChain chain) throws IOException, ServletException {
    //如果不是登陆请求,那么根本不会理这个请求
    if (!this.requiresAuthentication(request, response)) {
        //直接调用传入的FilterChain的doFilter方法
        //而这里传入的正好是VirtualFilterChain对象
        //这下知道为什么上面说是递归了吧
        chain.doFilter(request, response);
    } else {
        //如果是登陆请求,那么会执行登陆请求的相关逻辑,注意执行过程中出现任何问题都会抛出异常
        //比如用户名和密码错误,我们之前也已经测试过了,会得到一个BadCredentialsException
        try {
            //进行认证
            Authentication authenticationResult = this.attemptAuthentication(request, response);
            if (authenticationResult == null) {
                return;
            }

            this.sessionStrategy.onAuthentication(authenticationResult, request, response);
            if (this.continueChainBeforeSuccessfulAuthentication) {
                chain.doFilter(request, response);
            }

            //如果一路绿灯,没有报错,那么验证成功,执行successfulAuthentication
            this.successfulAuthentication(request, response, chain, authenticationResult);
        } catch (InternalAuthenticationServiceException var5) {
            this.logger.error("An internal error occurred while trying to authenticate the user.", var5);
            //验证失败,会执行unsuccessfulAuthentication
            this.unsuccessfulAuthentication(request, response, var5);
        } catch (AuthenticationException var6) {
            this.unsuccessfulAuthentication(request, response, var6);
        }

    }
}
那么我们来看看successfulAuthentication和unsuccessfulAuthentication分别做了什么:
protected void successfulAuthentication(HttpServletRequest request, HttpServletResponse response, FilterChain chain, Authentication authResult) throws IOException, ServletException {
    //向SecurityContextHolder添加认证信息,我们可以通过SecurityContextHolder对象获取当前登陆的用户
    SecurityContextHolder.getContext().setAuthentication(authResult);
    if (this.logger.isDebugEnabled()) {
        this.logger.debug(LogMessage.format("Set SecurityContextHolder to %s", authResult));
    }

    //记住我实现
    this.rememberMeServices.loginSuccess(request, response, authResult);
    if (this.eventPublisher != null) {
        this.eventPublisher.publishEvent(new InteractiveAuthenticationSuccessEvent(authResult, this.getClass()));
    }

    //调用默认的或是我们自己定义的AuthenticationSuccessHandler的onAuthenticationSuccess方法
    //这个根据我们配置文件决定
    //到这里其实页面就已经直接跳转了
    this.successHandler.onAuthenticationSuccess(request, response, authResult);
}

protected void unsuccessfulAuthentication(HttpServletRequest request, HttpServletResponse response, AuthenticationException failed) throws IOException, ServletException {
    //登陆失败会直接清理掉SecurityContextHolder中的认证信息
    SecurityContextHolder.clearContext();
    this.logger.trace("Failed to process authentication request", failed);
    this.logger.trace("Cleared SecurityContextHolder");
    this.logger.trace("Handling authentication failure");
    //登陆失败的记住我处理
    this.rememberMeServices.loginFail(request, response);
    //同上,调用默认或是我们自己定义的AuthenticationFailureHandler
    this.failureHandler.onAuthenticationFailure(request, response, failed);
}
了解了整个用户验证实现流程,其实其它的过滤器是如何实现的也就很容易联想到了,SpringSecurity的过滤器从某种意义上来说,更像是一个处理业务的Servlet,它做的事情不像是拦截,更像是完成自己对应的职责,只不过是使用了过滤器机制进行实现罢了,从而将所有的验证提前到进入Controller之前。
最后附上完整的过滤器清单,这里列出14个常见的内部过滤器:
| 过滤器名称 | 职责 |
|---|---|
| DisableEncodeUrlFilter | 禁止 HttpServletResponse 对 URL 进行编码,以防止在 URL 中包含 Session ID,此类 URL 不被视为 URL,因为会话 ID 可能会在 HTTP 访问日志等内容中泄露。 |
| WebAsyncManagerIntegrationFilter | 实现了对SecurityContext与WebAsyncManager的集成,使 Controller 中能够线程安全地获取到用户上下文认证信息。 |
| SecurityContextHolderFilter | 通过HttpSessionSecurityContextRepository接口从Session中读取SecurityContext或是直接创建新的,然后存入到SecurityContextHolder中,最后请求结束时会进行清理。 |
| HeaderWriterFilter | 给HTTP响应添加一些Header属性,如:X-Frame-Options、X-XSS-Protection、X-Content-Type-Options等。 |
| CsrfFilter | 针对Csrf相关校验。 |
| LogoutFilter | 对退出登录的请求进行处理,执行登出操作。 |
| UsernamePasswordAuthenticationFilter | 对登录的请求进行处理,执行登录操作。 |
| ConcurrentSessionFilter | 检查SessionRegistry保存的Session信息是否过期。 |
| RequestCacheAwareFilter | 缓存Request请求,可以用于恢复因登录而打断的请求。 |
| SecurityContextHolderAwareRequestFilter | 对ServletRequest进行进一步包装,让Request具有更加丰富的内容。 |
| RememberMeAuthenticationFilter | 针对于记住我Cookie进行校验。 |
| AnonymousAuthenticationFilter | 未验证成功的情况下进行匿名登录操作。 |
| SessionManagementFilter | Session管理相关。 |
| ExceptionTranslationFilter | 异常转换处理,比如最常见的AccessDenied之类的。 |
各位小伙伴感兴趣的话可以自行了解。
安全上下文
用户登录之后,怎么获取当前已经登录用户的信息呢?通过使用SecurityContextHolder就可以很方便地得到SecurityContext对象了,我们可以直接使用SecurityContext对象来获取当前的认证信息:
@RequestMapping("/index")
    public String index(){
        SecurityContext context = SecurityContextHolder.getContext();
        Authentication authentication = context.getAuthentication();
        User user = (User) authentication.getPrincipal();
        System.out.println(user.getUsername());
        System.out.println(user.getAuthorities());
        return "index";
    }

通过SecurityContext我们就可以快速获取当前用户的名称和授权信息等:

除了这种方式以外,我们还可以直接从Session中获取:
@RequestMapping("/index")
public String index(@SessionAttribute("SPRING_SECURITY_CONTEXT") SecurityContext context){
    Authentication authentication = context.getAuthentication();
    User user = (User) authentication.getPrincipal();
    System.out.println(user.getUsername());
    System.out.println(user.getAuthorities());
    return "index";
}
注意SecurityContextHolder是有一定的存储策略的,SecurityContextHolder中的SecurityContext对象会在一开始请求到来时被设定,至于存储方式其实是由存储策略决定的,如果我们这样编写,那么在默认情况下是无法获取到认证信息的:
@RequestMapping("/index")
public String index(){
    new Thread(() -> {   //创建一个子线程去获取
        SecurityContext context = SecurityContextHolder.getContext();
        Authentication authentication = context.getAuthentication();
        User user = (User) authentication.getPrincipal();   //NPE
        System.out.println(user.getUsername());
        System.out.println(user.getAuthorities());
    }).start();
    return "index";
}
这是因为SecurityContextHolder的存储策略默认是MODE_THREADLOCAL,它是基于ThreadLocal实现的,getContext()方法本质上调用的是对应的存储策略实现的方法:
SecurityContextHolderStrategy有三个实现类:
- GlobalSecurityContextHolderStrategy:全局模式,不常用
- ThreadLocalSecurityContextHolderStrategy:基于ThreadLocal实现,线程内可见
- InheritableThreadLocalSecurityContextHolderStrategy:基于InheritableThreadLocal实现,线程和子线程可见
因此,如果上述情况需要在子线程中获取,那么需要修改SecurityContextHolder的存储策略,在初始化的时候设置:
@PostConstruct
public void init(){
    SecurityContextHolder.setStrategyName(SecurityContextHolder.MODE_INHERITABLETHREADLOCAL);
}
这样在子线程中也可以获取认证信息了。

因为用户的验证信息是基于SecurityContext进行判断的,我们可以直接修改SecurityContext的内容,来手动为用户进行登陆:
@RequestMapping("/auth")
@ResponseBody
public String auth(){
    SecurityContext context = SecurityContextHolder.getContext();  //获取SecurityContext对象(当前会话肯定是没有登陆的)
    UsernamePasswordAuthenticationToken token = new UsernamePasswordAuthenticationToken("Test", null,
            AuthorityUtils.commaSeparatedStringToAuthorityList("ROLE_user"));  //手动创建一个UsernamePasswordAuthenticationToken对象,也就是用户的认证信息,角色需要添加ROLE_前缀,权限直接写
    context.setAuthentication(token);  //手动为SecurityContext设定认证信息
    return "Login success!";
}
在未登陆的情况下,访问此地址将直接进行手动登陆,再次访问/index页面,可以直接访问,说明手动设置认证信息成功。
疑惑: SecurityContext这玩意不是默认线程独占吗,那每次请求都是一个新的线程,按理说上一次的SecurityContext对象应该没了才对啊,为什么再次请求依然能够继续使用上一次SecurityContext中的认证信息呢?
SecurityContext的生命周期:请求到来时从Session中取出,放入SecurityContextHolder中,请求结束时从SecurityContextHolder取出,并放到Session中,实际上就是依靠Session来存储的,一旦会话过期验证信息也跟着消失。
下一节我们将详细讨论它的实现过程。
安全上下文持久化过滤器
SecurityContextHolderFilter也是内置的Filter,它就是专门用于处理SecurityContext的,这里先说一下大致流程,以便我们后续更加方便地理解:
当过滤器链执行到SecurityContextHolderFilter时,它会从HttpSession中把SecurityContext对象取出来(是存在Session中的,跟随会话的消失而消失),然后放入SecurityContextHolder对象中。请求结束后,再把SecurityContext存入HttpSession中,并清除SecurityContextHolder内的SecurityContext对象。
我们还是直接进入到源码中:
    @Override
    public void doFilter(ServletRequest request, ServletResponse response, FilterChain chain)
            throws IOException, ServletException {
    //开始套娃
        doFilter((HttpServletRequest) request, (HttpServletResponse) response, chain);
    }

    private void doFilter(HttpServletRequest request, HttpServletResponse response, FilterChain chain)
            throws ServletException, IOException {
    //防止重复的安全请求,不需要关心,一般是直接走下面
        if (request.getAttribute(FILTER_APPLIED) != null) {
            chain.doFilter(request, response);
            return;
        }
        request.setAttribute(FILTER_APPLIED, Boolean.TRUE);
    //这里通过SecurityContextRepository的loadDeferredContext获取到SecurityContext对象的Supplier
        Supplier<SecurityContext> deferredContext = this.securityContextRepository.loadDeferredContext(request);
        ...
    }
我们接着来看loadDeferredContext的实现细节,其中SecurityContextRepository的实现类是DelegatingSecurityContextRepository类,这个类中维护了多个SecurityContextRepository实现类,而其本身并没有实现loadDeferredContext方法,而是靠内部维护的其他SecurityContextRepository实现类来完成:
    @Override
    public DeferredSecurityContext loadDeferredContext(HttpServletRequest request) {
    //DeferredSecurityContext是一个支持延时生成的SecurityContext,本质是一个SecurityContext的Supplier
        DeferredSecurityContext deferredSecurityContext = null;
    //遍历内部维护的其他SecurityContextRepository实现,一般包含以下两个:
    //1. HttpSessionSecurityContextRepository
    //2. RequestAttributeSecurityContextRepository
        for (SecurityContextRepository delegate : this.delegates) {
      //这个if-else语句其实为了添加多个SecurityContextRepository提供的SecurityContext并将其组成一个链状结构的DelegatingDeferredSecurityContext(至于为什么,我们接着往下看)
            if (deferredSecurityContext == null) {
                deferredSecurityContext = delegate.loadDeferredContext(request);
            }
            else {
                DeferredSecurityContext next = delegate.loadDeferredContext(request);
                deferredSecurityContext = new DelegatingDeferredSecurityContext(deferredSecurityContext, next);
            }
        }
        return deferredSecurityContext;
    }
首先我们来看第一个HttpSessionSecurityContextRepository,它是第一个被遍历的实现:
    @Override
    public DeferredSecurityContext loadDeferredContext(HttpServletRequest request) {
        Supplier<SecurityContext> supplier = () -> readSecurityContextFromSession(request.getSession(false));  //从Session中取出SecurityContext
        return new SupplierDeferredSecurityContext(supplier, this.securityContextHolderStrategy);
    }

    public static final String SPRING_SECURITY_CONTEXT_KEY = "SPRING_SECURITY_CONTEXT";
    private String springSecurityContextKey = SPRING_SECURITY_CONTEXT_KEY;

    private SecurityContext readSecurityContextFromSession(HttpSession httpSession) {
        ...
    //实际上这里就是从Session中通过键“SPRING_SECURITY_CONTEXT”取出的SecurityContext
    //跟我们上一节使用的是完全一样的,这下就很清晰了
    //如果用户没有登录验证,那么这里获取到的SecurityContext就是null了
        Object contextFromSession = httpSession.getAttribute(this.springSecurityContextKey);
        ...
        return (SecurityContext) contextFromSession;
    }
最后返回回去的是一个SupplierDeferredSecurityContext对象:
final class SupplierDeferredSecurityContext implements DeferredSecurityContext {

    private static final Log logger = LogFactory.getLog(SupplierDeferredSecurityContext.class);

    private final Supplier<SecurityContext> supplier;

    private final SecurityContextHolderStrategy strategy;

    private SecurityContext securityContext;

    private boolean missingContext;

    SupplierDeferredSecurityContext(Supplier<SecurityContext> supplier, SecurityContextHolderStrategy strategy) {
        this.supplier = supplier;
        this.strategy = strategy;
    }

    @Override
    public SecurityContext get() {
    //在获取SecurityContext时会进行一次初始化
        init();
        return this.securityContext;
    }

    @Override
    public boolean isGenerated() {
        init();
    //初始化后判断是否为未登录的SecurityContext
        return this.missingContext;
    }

    private void init() {
    //如果securityContext不为null表示已经初始化过了
        if (this.securityContext != null) {
            return;
        }
        //直接通过supplier获取securityContext对象
        this.securityContext = this.supplier.get();
    //如果securityContext对象为null,那么就标记missingContext
        this.missingContext = (this.securityContext == null);
        if (this.missingContext) {
      //当missingContext为真时,说明没有securityContext(一般是未登录的情况)
      //那么就创建一个空的securityContext,不包含任何认证信息
            this.securityContext = this.strategy.createEmptyContext();
      //日志无视就好
            if (logger.isTraceEnabled()) {
                logger.trace(LogMessage.format("Created %s", this.securityContext));
            }
        }
    }

}
接着是第二个被遍历的实现RequestAttributeSecurityContextRepository类:
    @Override
    public DeferredSecurityContext loadDeferredContext(HttpServletRequest request) {
        Supplier<SecurityContext> supplier = () -> getContext(request);
    //同样是返回SupplierDeferredSecurityContext对象
        return new SupplierDeferredSecurityContext(supplier, this.securityContextHolderStrategy);
    }

    private SecurityContext getContext(HttpServletRequest request) {
    //通过HttpServletRequest的Attribute获取SecurityContext
    //由于一般情况下没有设定过,因此得到的就是null
        return (SecurityContext) request.getAttribute(this.requestAttributeName);
    }
最后,两个SecurityContext就会以链式存放在DelegatingDeferredSecurityContext对象中,一并返回了,它的内部长这样:
static final class DelegatingDeferredSecurityContext implements DeferredSecurityContext {

        private final DeferredSecurityContext previous;

        private final DeferredSecurityContext next;

        DelegatingDeferredSecurityContext(DeferredSecurityContext previous, DeferredSecurityContext next) {
            this.previous = previous;
            this.next = next;
        }

        @Override
        public SecurityContext get() {
      //在获取SecurityContext时,会首先从最前面的开始获取
            SecurityContext securityContext = this.previous.get();
      //如果最前面的SecurityContext是已登录的,那么直接返回这个SecurityContext
            if (!this.previous.isGenerated()) {
                return securityContext;
            }
      //否则继续看后面的,也许后面的会有已登录的(实在没有就直接返回一个空的SecurityContext了)
            return this.next.get();
        }

        @Override
        public boolean isGenerated() {
            return this.previous.isGenerated() && this.next.isGenerated();
        }
}
兜了这么大一圈,现在回到一开始的Filter中:
    private void doFilter(HttpServletRequest request, HttpServletResponse response, FilterChain chain)
            throws ServletException, IOException {
        ...
    Supplier<SecurityContext> deferredContext = this.securityContextRepository.loadDeferredContext(request);
    //拿到最终的SecurityContext的Supplier后,继续下面的语句
        try {
      //向securityContextHolderStrategy中设置我们上面得到的DeferredSecurityContext
            this.securityContextHolderStrategy.setDeferredContext(deferredContext);
      //请求前的任务已完成,继续其他过滤器了
            chain.doFilter(request, response);
        }
        finally {
      //请求结束后,清理掉securityContextHolderStrategy中的DeferredSecurityContext
            this.securityContextHolderStrategy.clearContext();
            request.removeAttribute(FILTER_APPLIED);
        }
    }
最后我们再来看一下我们之前通过SecurityContextHolder是如何获取到SecurityContext的:
public class SecurityContextHolder {
    ...
  private static String strategyName = System.getProperty(SYSTEM_PROPERTY);
    private static SecurityContextHolderStrategy strategy;
    private static int initializeCount = 0;

    static {
    //类加载时会进行一次初始化
        initialize();
    }

    private static void initialize() {
    //初始化会将对应的SecurityContextHolderStrategy对象给创建
        initializeStrategy();
        initializeCount++;
    }

  //初始化SecurityContextHolderStrategy对象
    private static void initializeStrategy() {
        ...
        // 尝试加载系统配置中设定的Strategy实现类,默认是MODE_THREADLOCAL
        try {
            Class<?> clazz = Class.forName(strategyName);
            Constructor<?> customStrategy = clazz.getConstructor();
      // 这里直接根据配置中的类名,用反射怒艹一个对象出来
            strategy = (SecurityContextHolderStrategy) customStrategy.newInstance();
        }
        catch (Exception ex) {
            ReflectionUtils.handleReflectionException(ex);
        }
    }

    //清除Context中的内容,实际上就是清理SecurityContextHolderStrategy中的内容
    public static void clearContext() {
        strategy.clearContext();
    }

    //获取SecurityContext对象
    public static SecurityContext getContext() {
    //获取SecurityContext实际上也是通过SecurityContextHolderStrategy根据策略来获取
        return strategy.getContext();
    }

  ...
}
我们发现,实际上SecurityContextHolder获取SecurityContext对象,就是通过SecurityContextHolderStrategy根据策略来获取,我们直接来看SecurityContextHolderStrategy的实现类:
final class ThreadLocalSecurityContextHolderStrategy implements SecurityContextHolderStrategy {

  //内部维护一个ThreadLocal对象,按线程存储对应的DeferredSecurityContext
    private static final ThreadLocal<Supplier<SecurityContext>> contextHolder = new ThreadLocal<>();

    @Override
    public void clearContext() {
    //清理实际上是直接清理掉ThreadLocal中存的对象
        contextHolder.remove();
    }

    @Override
    public SecurityContext getContext() {
    //获取也很简单,直接通过Supplier拿到需要的SecurityContext对象
        return getDeferredContext().get();
    }

    @Override
    public Supplier<SecurityContext> getDeferredContext() {
        Supplier<SecurityContext> result = contextHolder.get();
    //如果存储的DeferredSecurityContext为null,这里临时创建一个空的SecurityContext并保存
        if (result == null) {
            SecurityContext context = createEmptyContext();
            result = () -> context;
            contextHolder.set(result);
        }
        return result;
    }

    ...

}
这样,整个流程其实就很清楚了,项目启动时,SecurityContextHolder会自动根据配置创建对应的SecurityContextHolderStrategy对象。当我们的请求到来之后,首先会经过SecurityContextHolderFilter,然后在这个阶段,通过SecurityContextRepository来将不同地方存储(一般是Session中存储)的SecurityContext对象取出并封装为DefferdSecurityContext,然后将其添加到一开始创建好的SecurityContextHolderStrategy对象中,这样,我们的Controller在处理时就能直接从SecurityContextHolder取出SecurityContext对象了,最后在处理结束返回响应时,SecurityContextHolderFilter也会将SecurityContextHolderStrategy存储的DefferdSecurityContext清除掉,至此,一个完整流程结束。


